The new release of Microsoft Dynamics 365 Business Central is out. In this post, you will learn 3 of the most important improvements in Business Central 2023 wave 1 (v22). Until the general availability in April 2023, you can test them on the preview release.
- Master Data Management
- Analysis Mode
- Custom Error Actions
Get the full information of the release plan here:
Master Data Management
For environments with several companies, this feature is key. Time-saving is something we are always looking forward to getting.
The idea of this feature is to have a master company, and the rest can be set up to be synchronized with the master company. So, whenever data is changed in the master, the other one is changed automatically.
Access the ‘Master Data Management Setup‘ page from the company you wish to synchronize. Here you can choose the source company and enable data synchronization.

If you enable the sync, this message will appear.

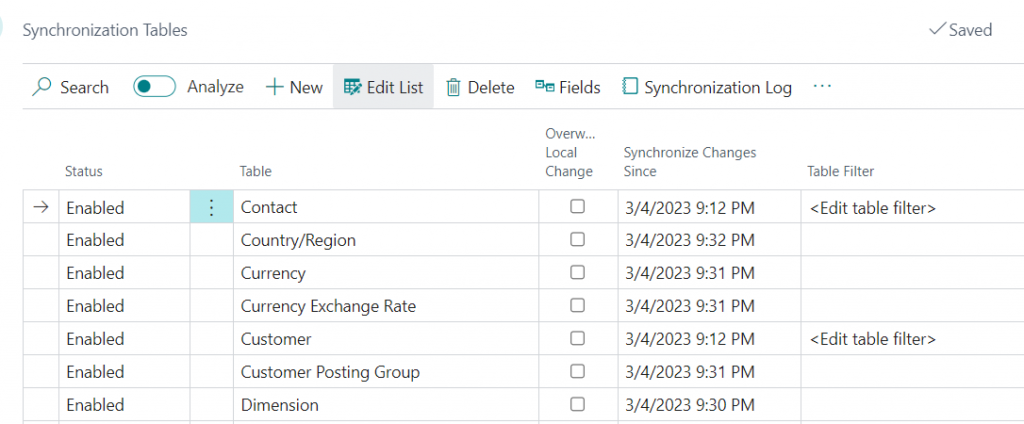
You can set up the tables to be synchronized on the ‘Synchronization Tables‘ page :
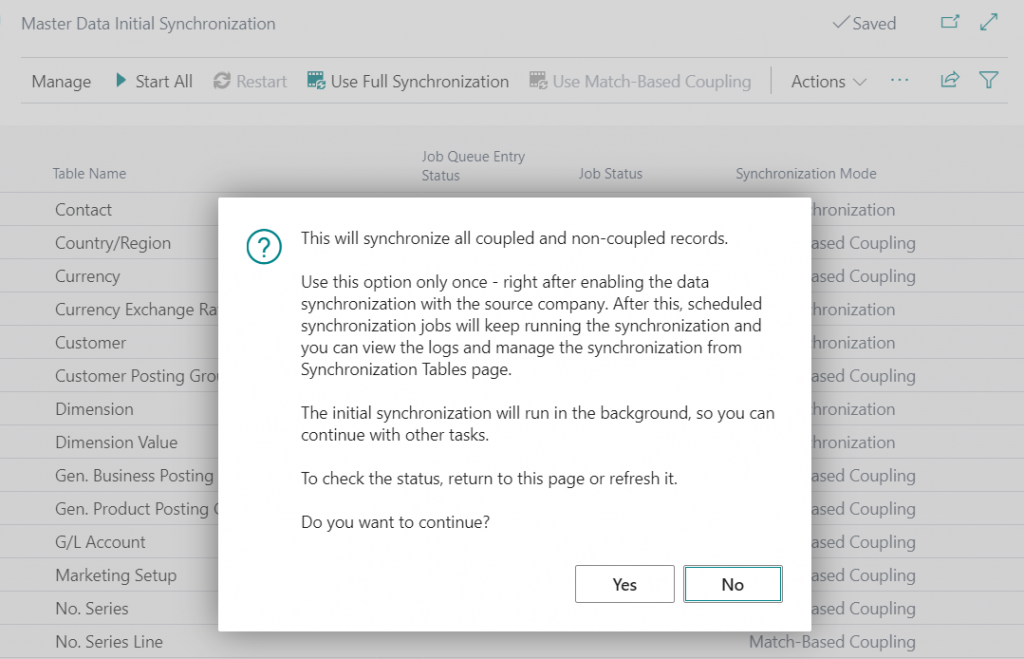
When you access the ‘Initial Synchronization’ page you cant start the sync by clicking on ‘Start All‘. The following message will appear.
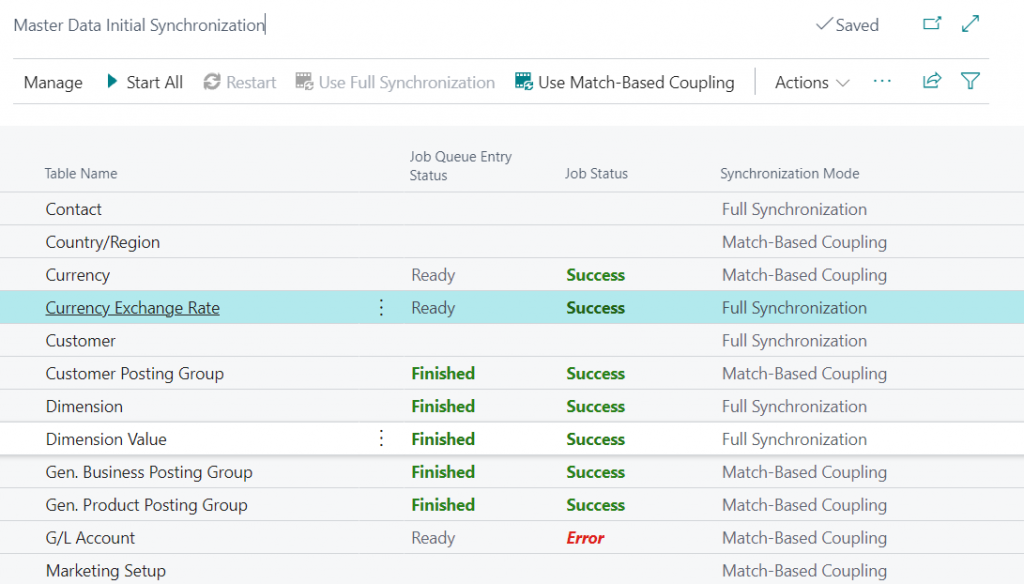
You can see the status of the Job Queues while running.
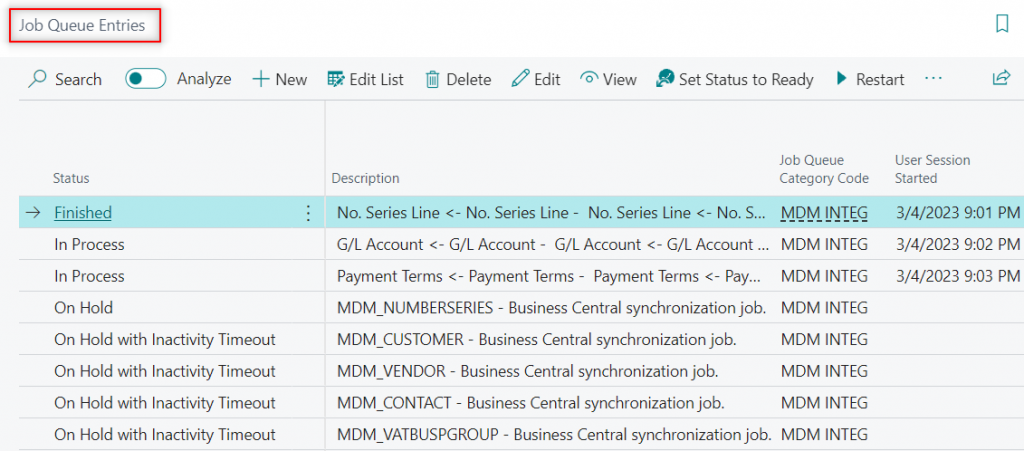
Also, access the ‘Job Queue Entries’ page. All entries from ‘MDM INTEG‘ category are the ones created by this feature and are running in the background.
This video test shows how a vendor is created in the second company once created in the source. Once modified, it also gets modified in the other.
Get the full information of this feature here:
Analysis Mode
This feature alone is one of the biggest changes in the user interfaces that Microsoft has introduced recently. Together with what is capable of, makes it one of the top new features of this release.
First, enable it on the ‘Feature Management‘ page.

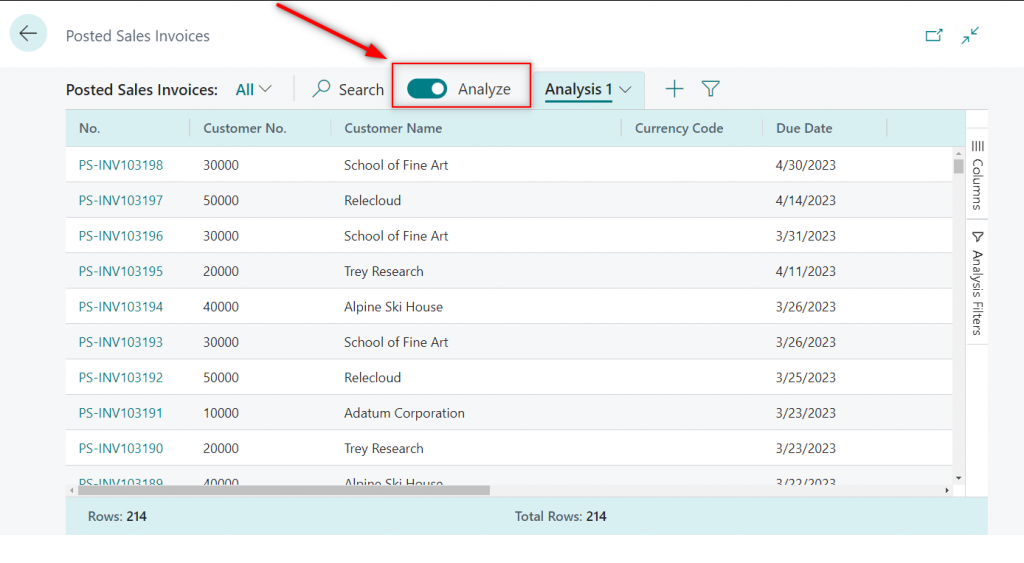
From now on, every list you access will have a switch called ‘Analyze‘ that can be enabled. When you do so, a view like this will appear.
What can you do now?
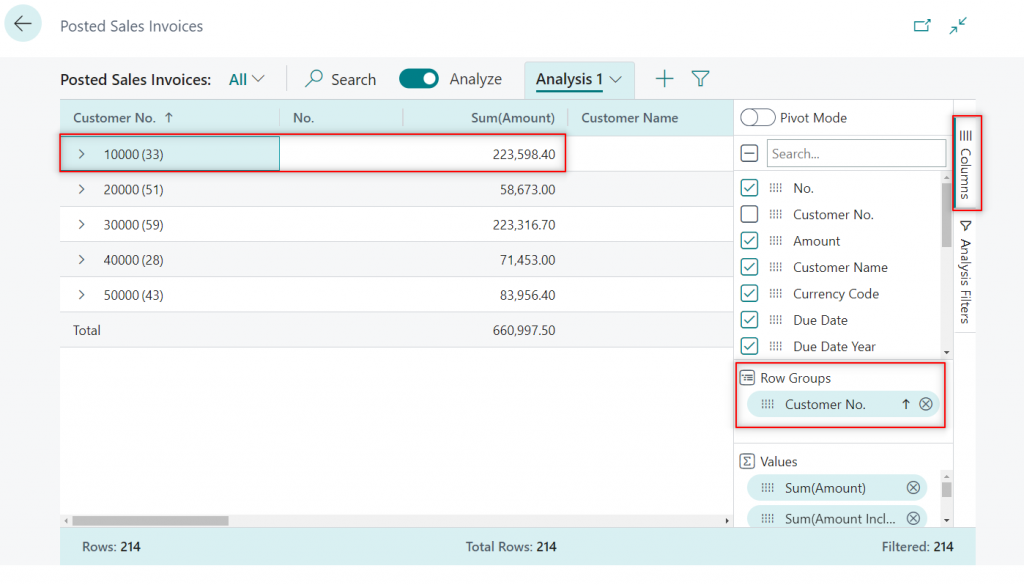
For example, you can group by customer in the ‘Columns‘ pane. See how customer ‘10000’ has 33 posted invoices that sum 223,598.4. And you can see it for every customer and the total amount for them.
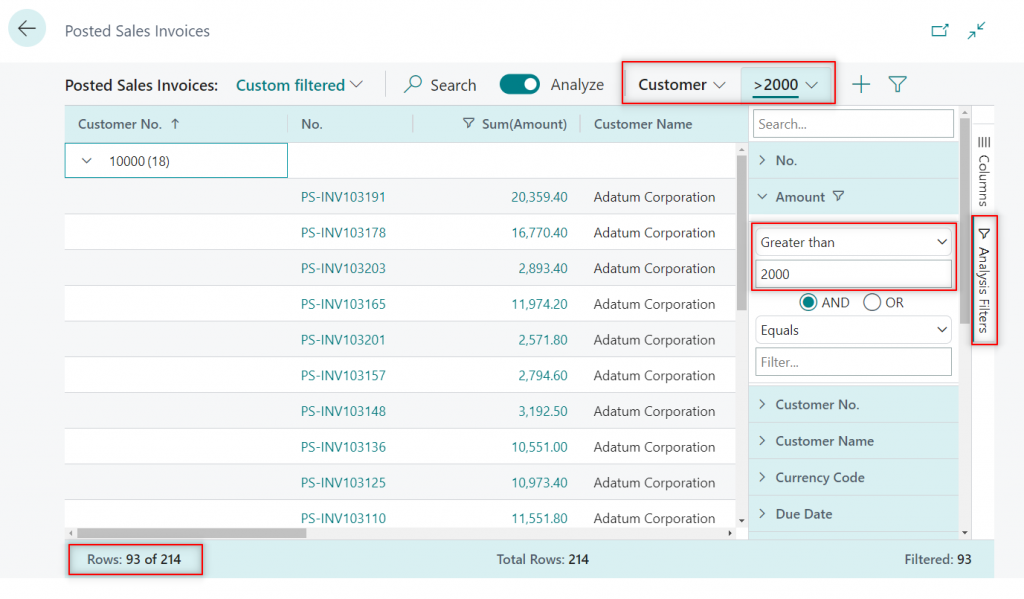
You can save this analysis view and create new ones. Now, we are filtering invoices above 2000 from the ‘Analysis Filters‘ pane. You can expand and see every invoice above it.
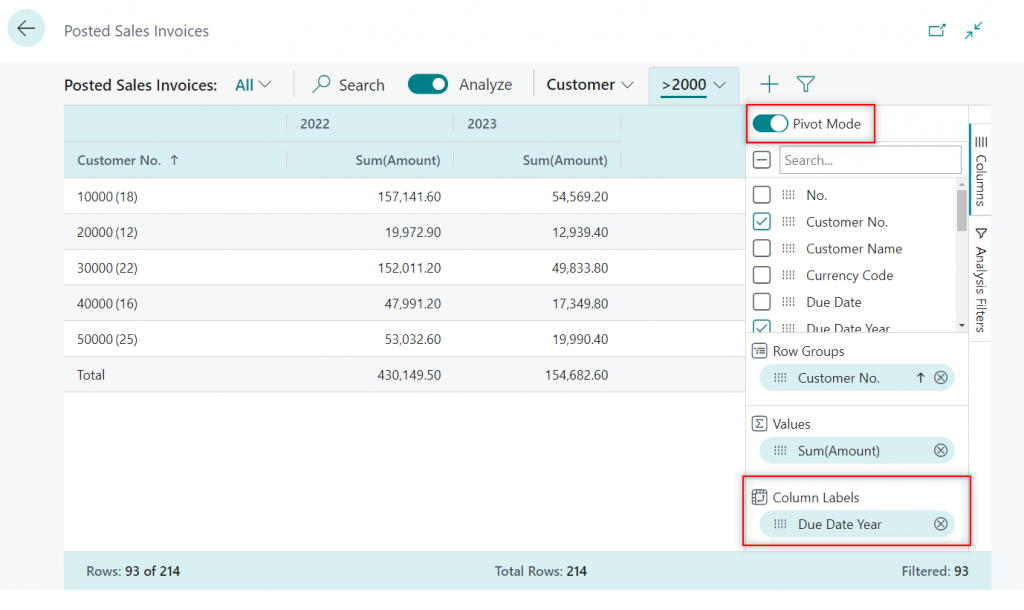
Also, you can enable ‘Pivot Mode‘ and create a view where the columns are due dates for the posted invoices, for example.
Create all sorts of views and combinations with this new feature, there are no limits. Make sure to try it out!
Also, check the following link with some examples of usage here:
https://github.com/microsoft/BCTech/tree/master/samples/AnalyzeData
Note how the switch becomes this new logo when the screen is shortened.

Get the full information about the feature here.
Custom Error Actions
From this release, we have the possibility to add actions to the errors themselves. This is what it looks like:

A title can be also added.

It´s a very similar feature to notification actions. Learn more about them in this article:
How do they work?
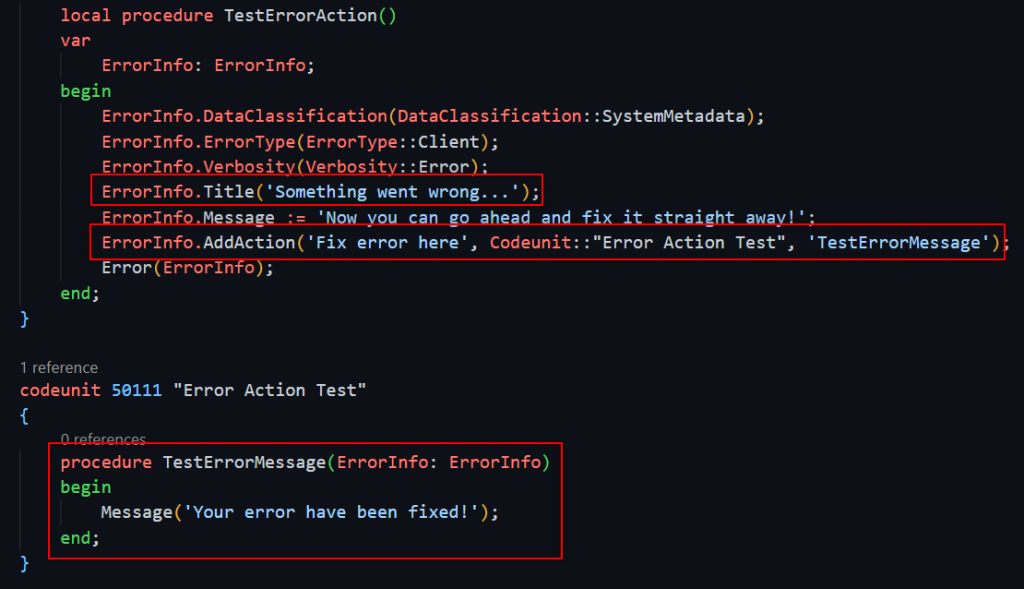
Two new properties have been added to the ErrorInfo type, ErrorInfo.Title and ErrorInfo.AddAction.
ErrorInfo.Title is quite simple, you just need to enter some description for the error.
ErrorInfo.AddAction has three parameters. The first is the caption, the second is the codeunit to run, and the third is the method name.
The codeunit is where you can help the user fix the error by taking them to another page or perform any type of operation that is needed.
Note that the procedure should be global and have an ‘ErrorInfo‘ parameter.
Check Microsoft release for custom error actions here.
Honorable Mention To AL Explorer And AL Home
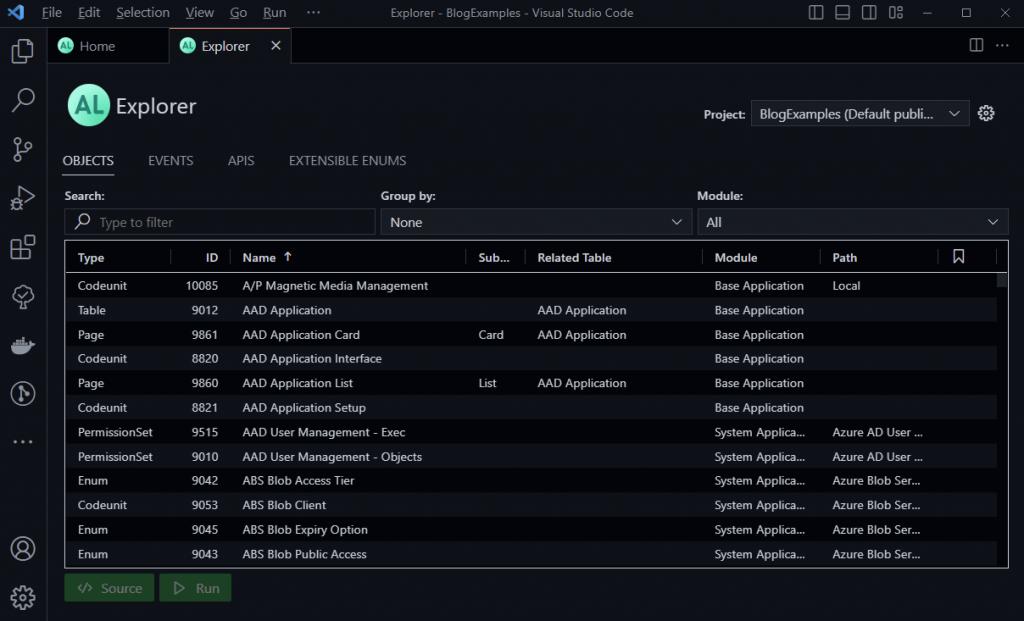
From AL Language v11 we have access to ‘AL Explorer‘. A new way of exploring the base app, events, APIs, etc. Along with our own objects.
This is what it looks like.
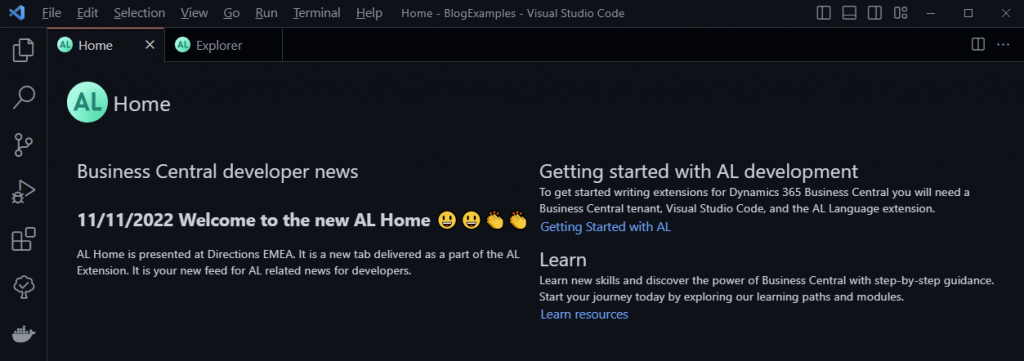
And ‘AL Home‘, a space to learn about news, best practices, upcoming events, etc.
Get more information about them here.
That´s all. Hope you find it helpful.
