
In this article, we’ll explore how to use Postman, a popular API development tool, to connect and get data from Business Central. We’ll start by setting up OAuth in Azure, then using Postman to consume OData endpoints. Finally, we’ll look at how to use SOAP endpoints as well.
- What Is Postman?
- Creating An Azure Application With OAuth
- Using OData Endpoints In Postman
- Using SOAP Endpoints In Postman
What Is Postman?
Postman is an API platform for developers to design, build, and test APIs. It provides a user-friendly interface for sending HTTP requests to web servers and receiving responses.
In other words, it allows developers to interact with APIs and exchange information.
Creating An Azure Application With OAuth
This first step is required to provide Postman with the credentials. We must tell Postman that Business Central grants permissions and is able to access our company data.
There are two types of authentication methods, basic and OAuth. Since basic is deprecated on cloud environments, we will focus on OAuth in this guide.
Setting OAuth requires two main steps:
- Register an app in Azure Portal
- Register an AAD app in Business Central
Register An App In Azure
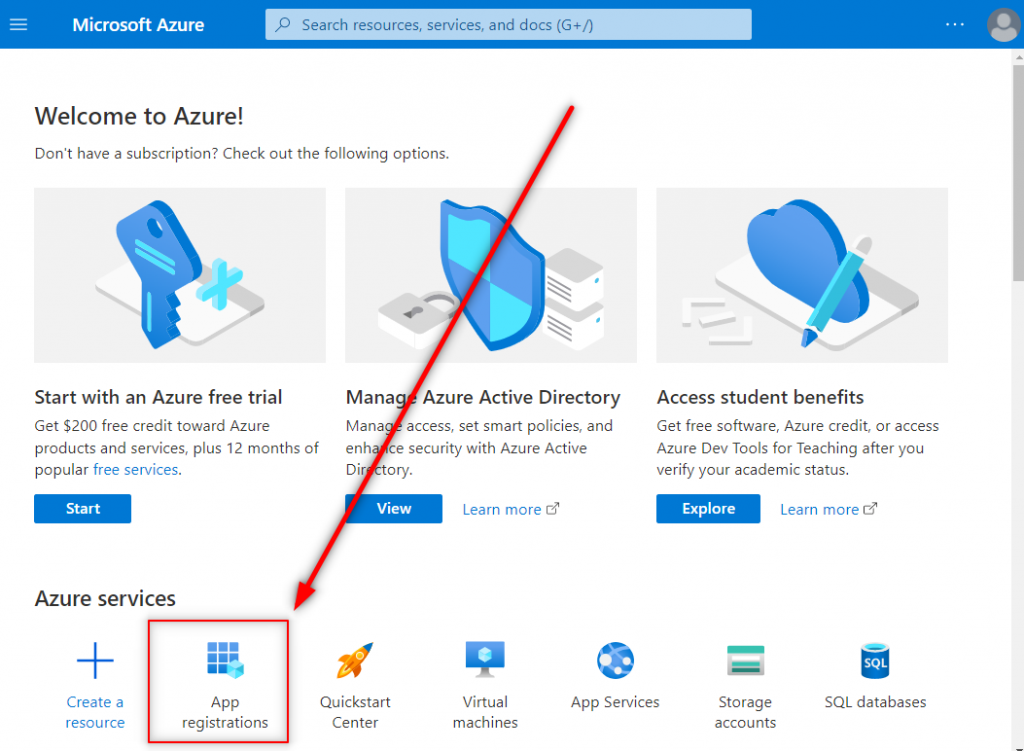
In the Azure portal choose ‘App registrations’ and create a new one.
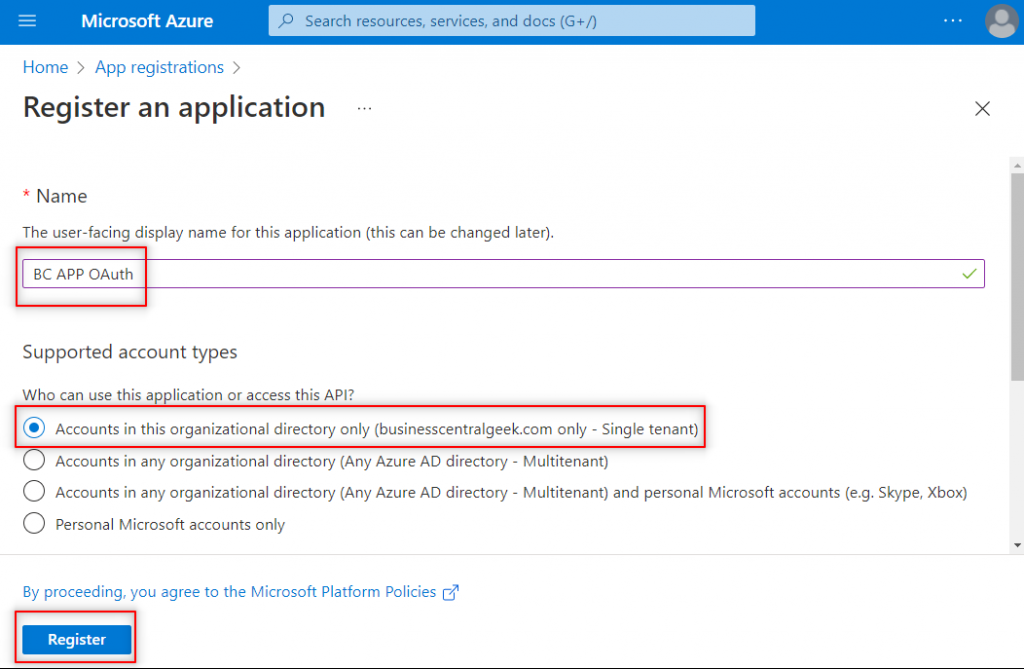
Give it a name and register it.
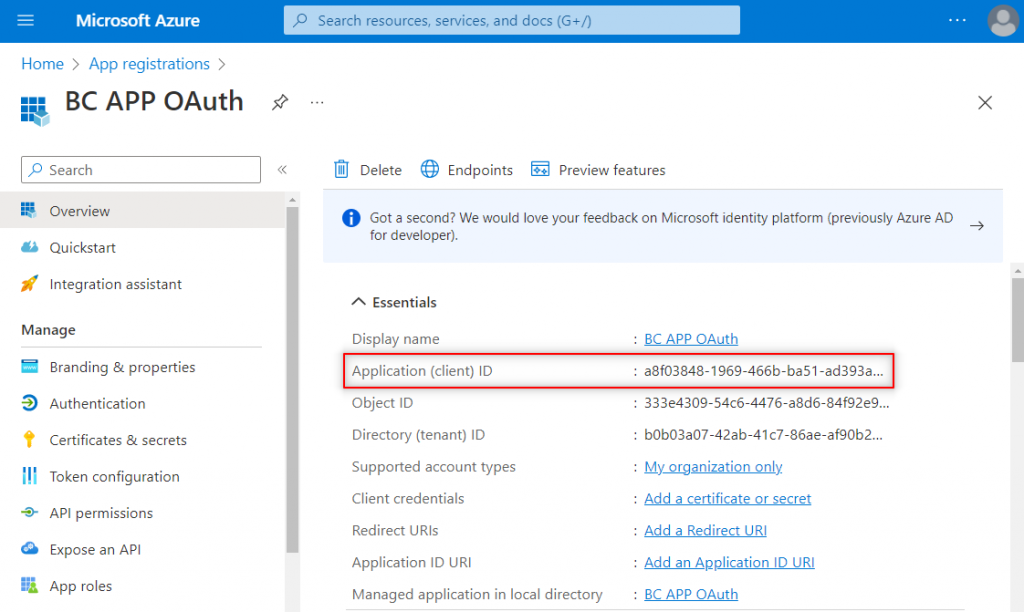
You can see that an application ID has been given, we will use this value later on Postman.
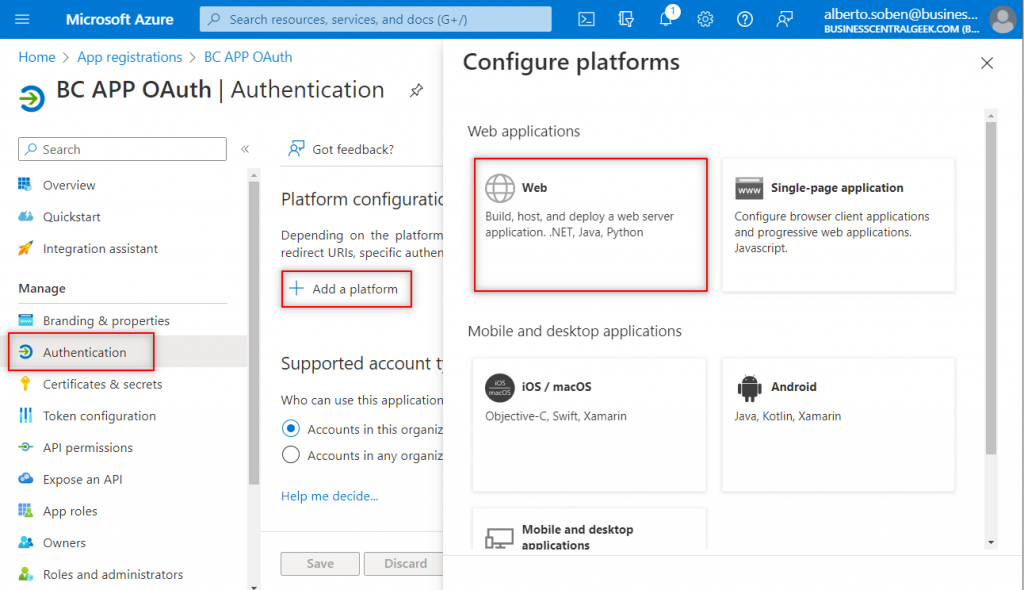
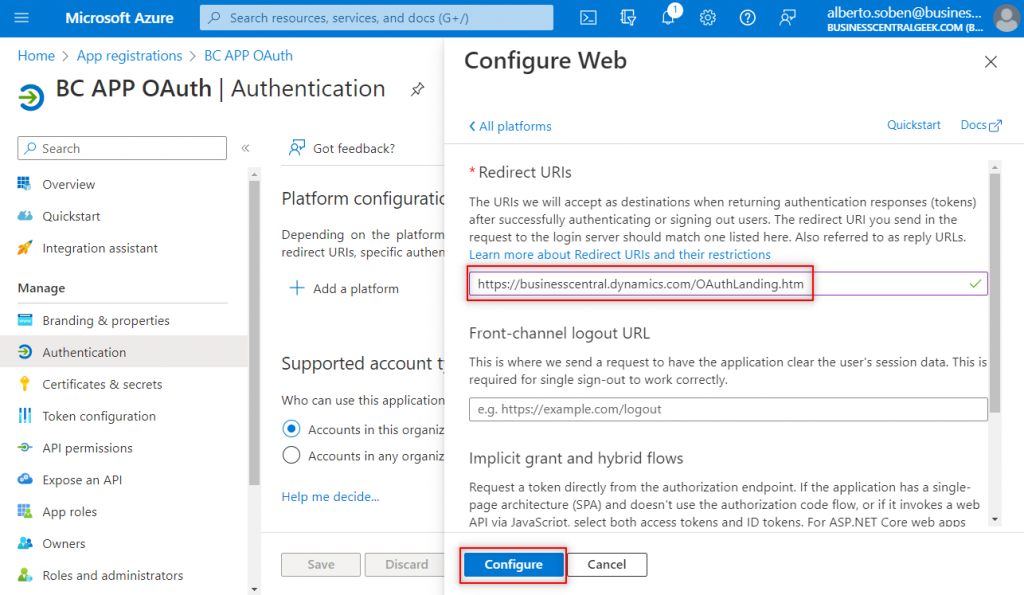
Go to Authentication. Add a web application.
Set the redirect URI: https://businesscentral.dynamics.com/OAuthLanding.htm
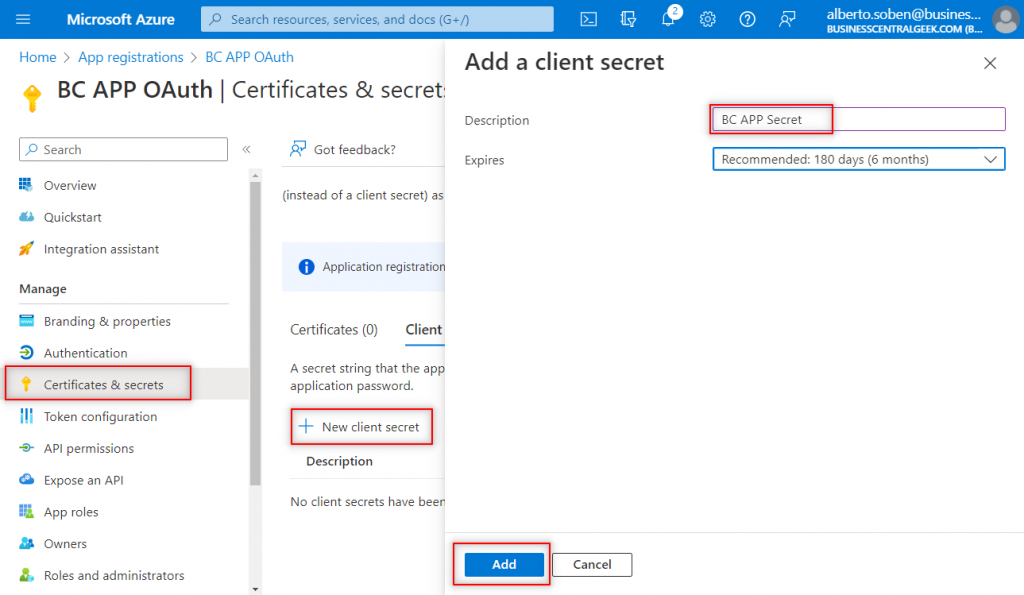
Go to ‘Certifactes & secrets’ and generate a new secret.
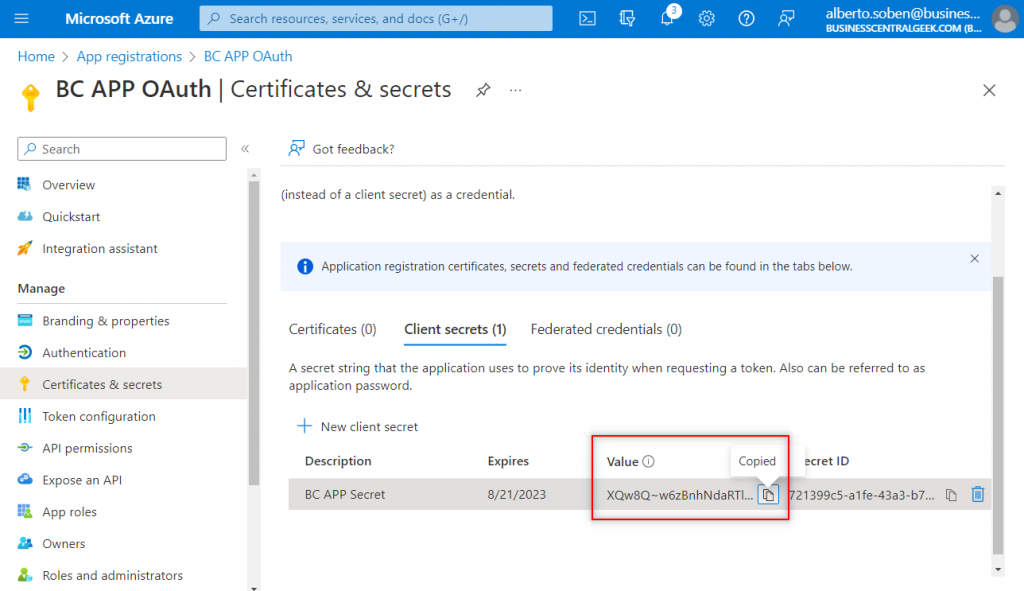
Copy the secret value right away, it will only be visible this time. We will use it also on Postman.
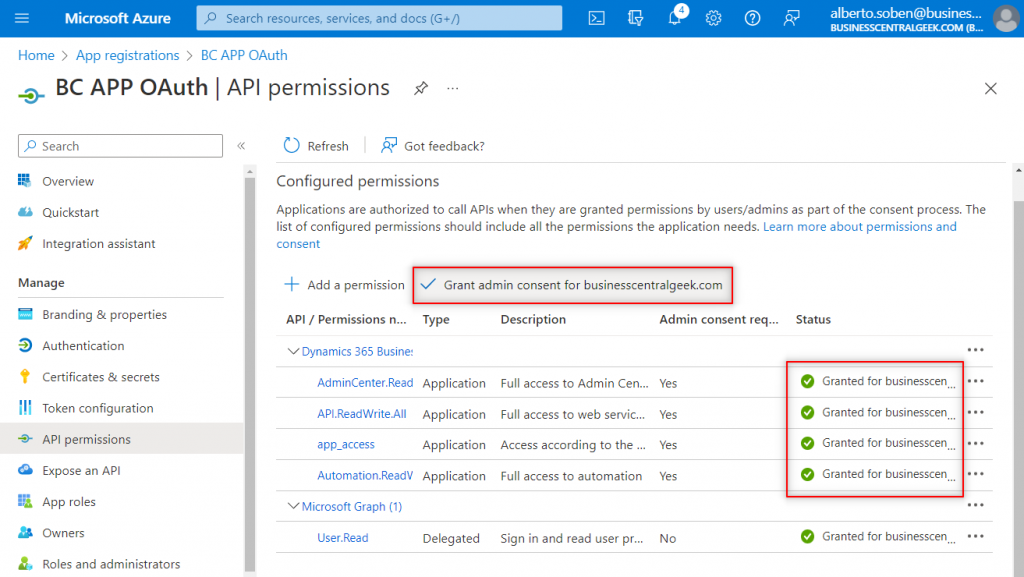
Finally, go to API permissions and add a Dynamics 365 Business Central permission.

For this example, we will be using ‘Application permissions’. Meaning that no signed-in user is required. Only an ADD application will be needed in Business Central. See how to do it below, after granting permissions.
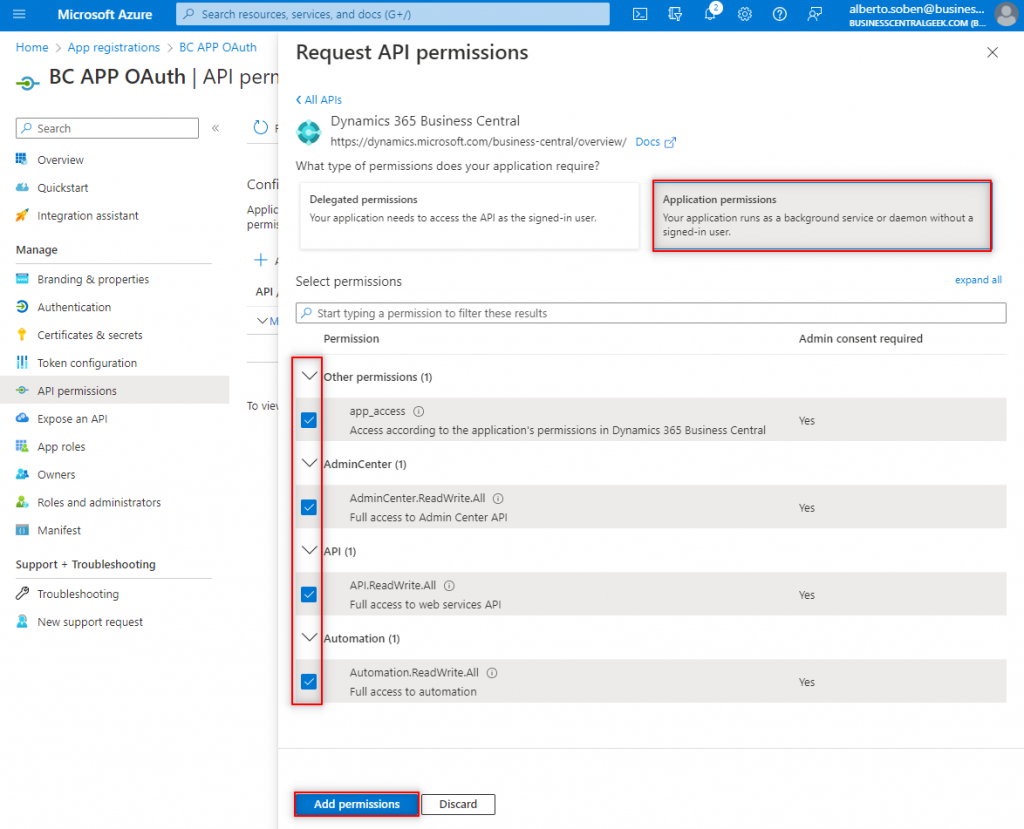
Make sure to grant admin consent for the permissions added, otherwise the request won´t work.
At this point, if we use Postman (we will see how to do it step by step in the next section), we receive the next response:
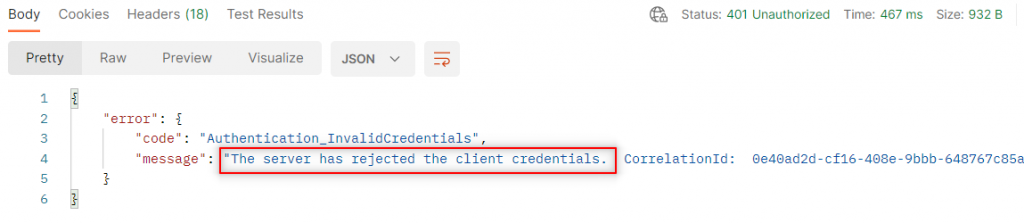
For it to work, you need to create an AAD application in Business Central.
Register An AAD App In Business Central
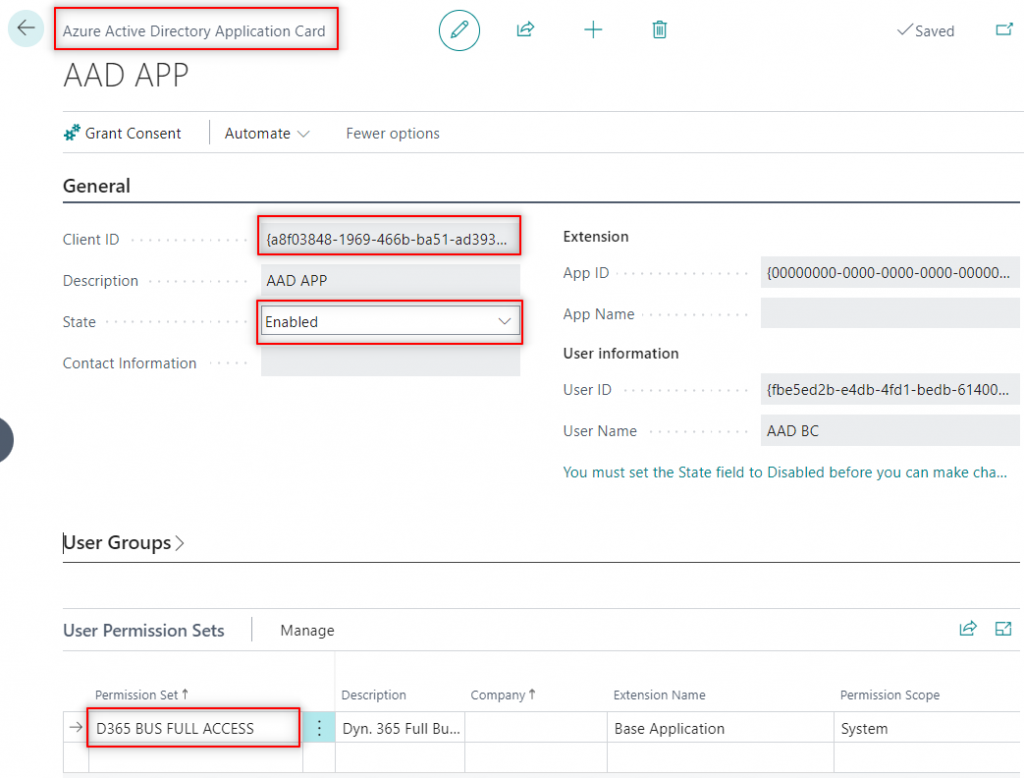
An AAD App (Microsoft Entra Application) will act as the permission granter. These are the steps involved.
- Go to the ‘Azure Active Directory Applications’ list and create a new one.
- Enter the Client ID of the app created in Azure.
- Enable the app in the ‘State’ field.
- Give a permission set or assign a user group.
- If you didn´t grant admin consent from Azure you can do it here as well in the ‘Grant Consent’ action.
Everything is ready now to start working in Postman. We can test standard and custom APIs. As well as OData and SOAP endpoints.
Using OData Endpoints In Postman
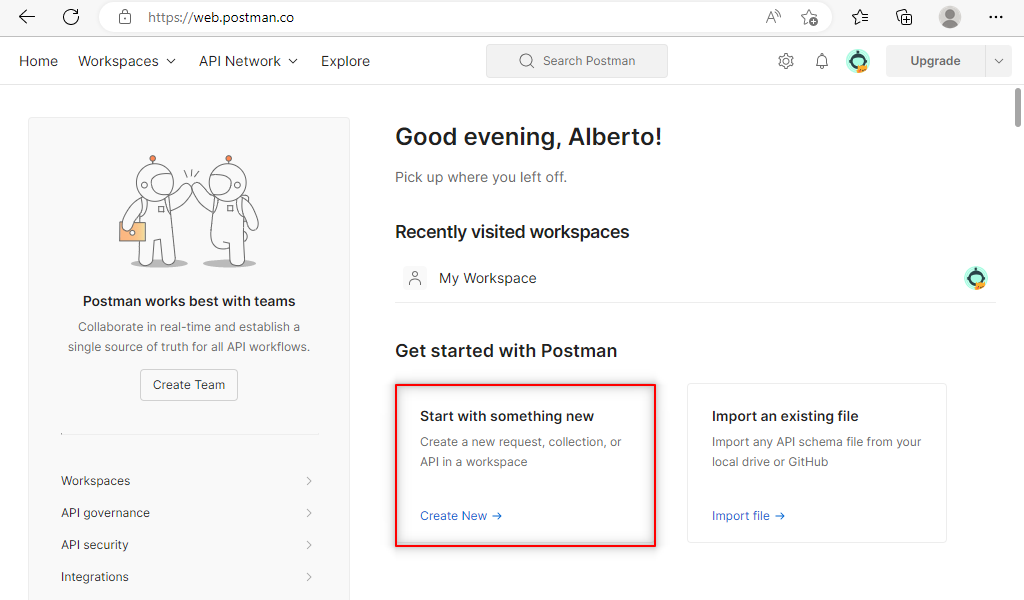
Go to Postman´s website and create a new account. You can do it here:
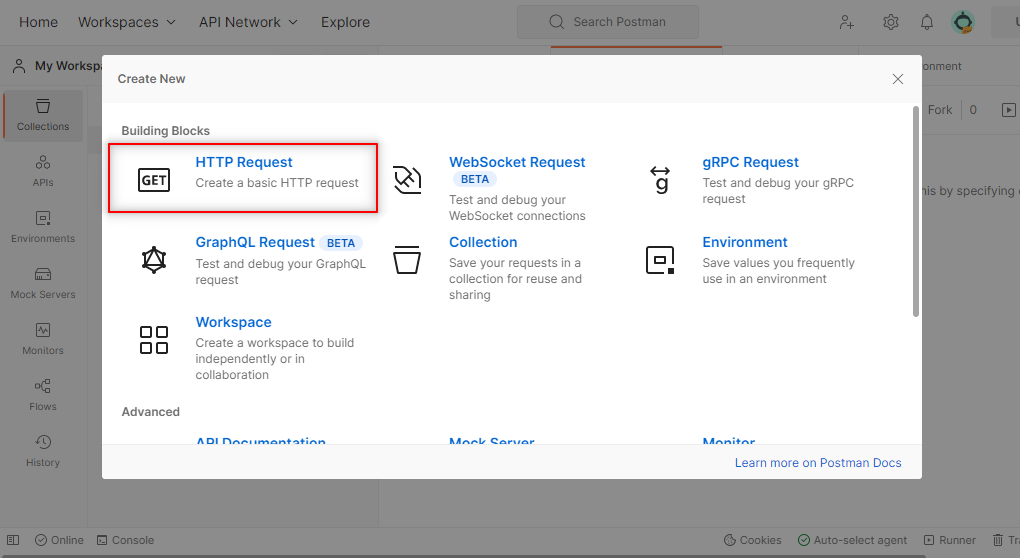
Click on ‘Start with something new’.
Click on new ‘HTTP Request’.
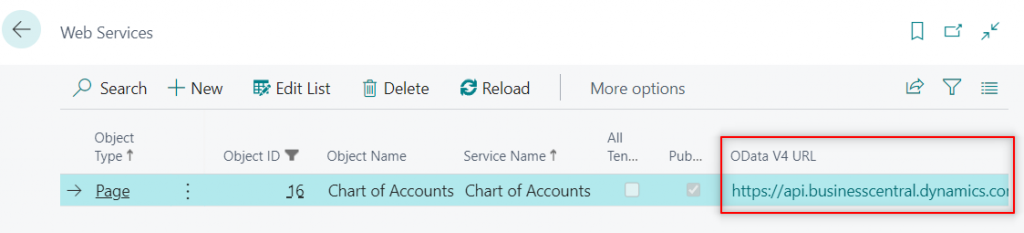
In order to test an API, an API endpoint is needed. For that, choose one endpoint from the web services page of Business Central. For this example, we will use the OData V4 URL.
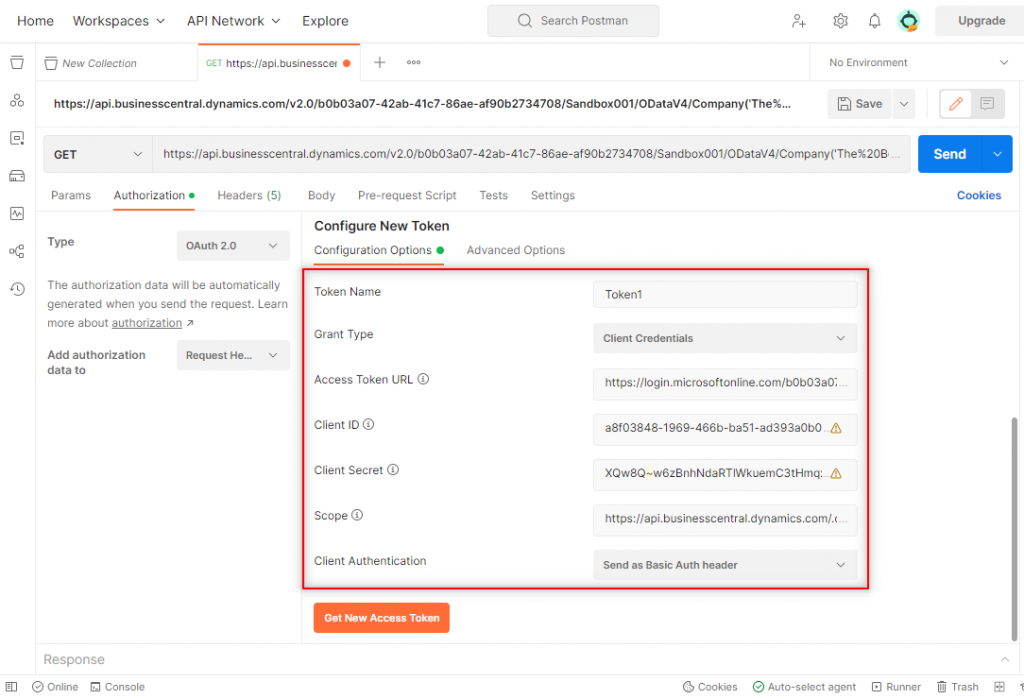
Select OAuth 2.0 type as the authorization method.

If you scroll down a little, you can see the fields required for the connection. We will fill them with the information gathered from Azure:
- Access Token URL. Enter this URL with your tenant ID: https://login.microsoftonline.com/(tenantID)/oauth2/v2.0/token
- Client ID. The one copied from Azure.
- Client Secret. The one copied from Azure.
- Scope. Enter: https://api.businesscentral.dynamics.com/.default
When all the information is entered click on ‘Get New Access Token’.
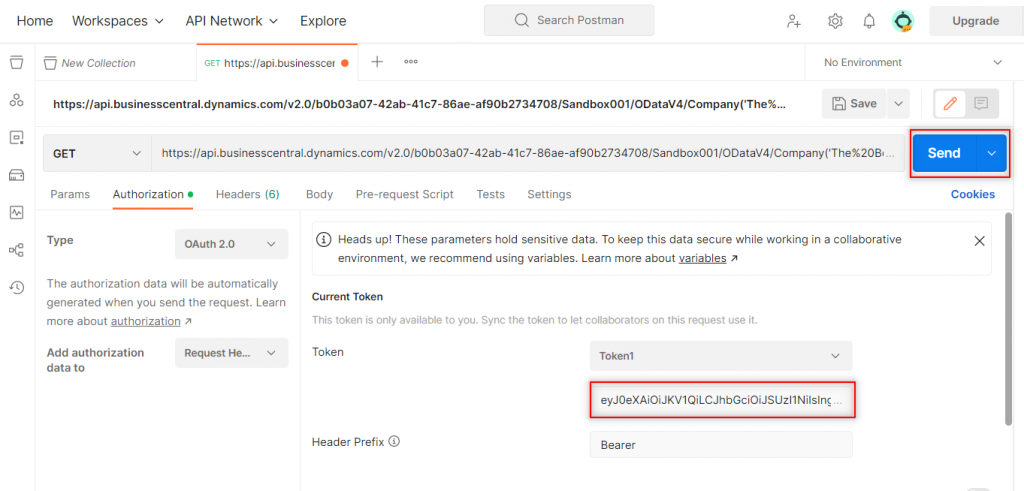
If everything went well, you can see the token generated. Click on ‘Use Token’.

Note that the Token has been filled in below the Token name. Finally, click on ‘Send’.
If we set it up correctly, we will receive a ‘200 OK‘ response. Meaning that the request was successful. As we can see, we get all the data from the chart of accounts.
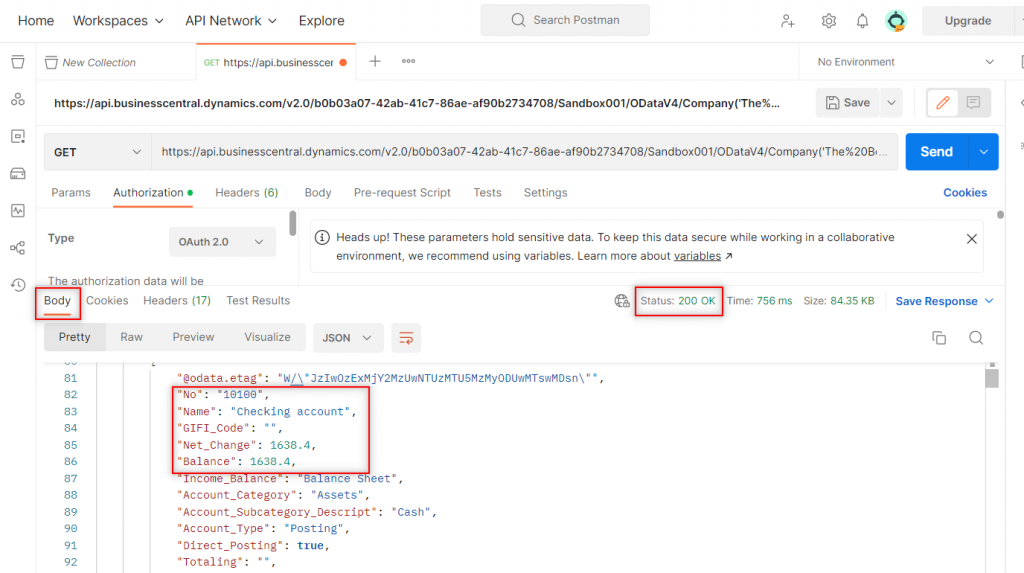
Note that the data received is a JSON object.
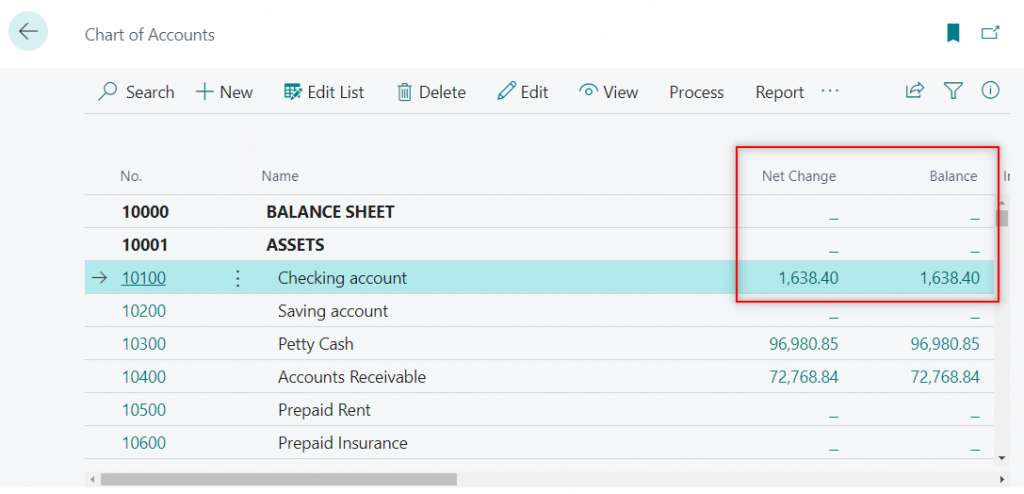
We can verify the response information in Business Central:
Using SOAP Endpoints In Postman
In the next example, you will learn how to use SOAP endpoints in Postman.
Be aware that, eventually, the support for SOAP endpoints will be removed. However, the date isn´t specified yet.
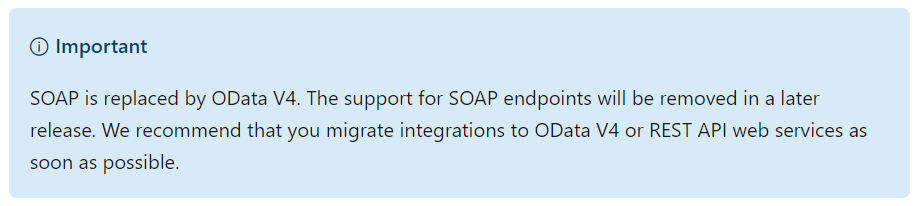
For further information, follow the Microsoft documentation here:
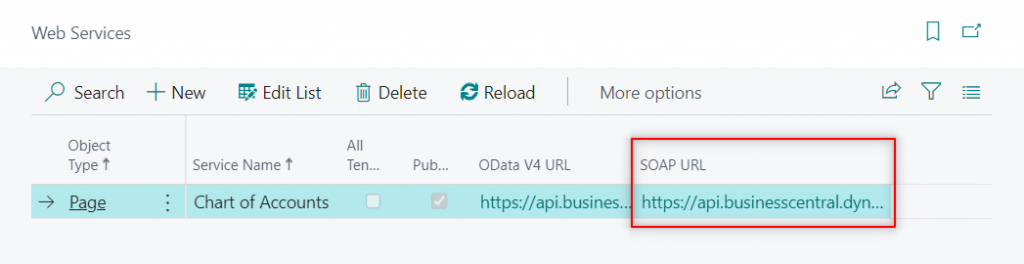
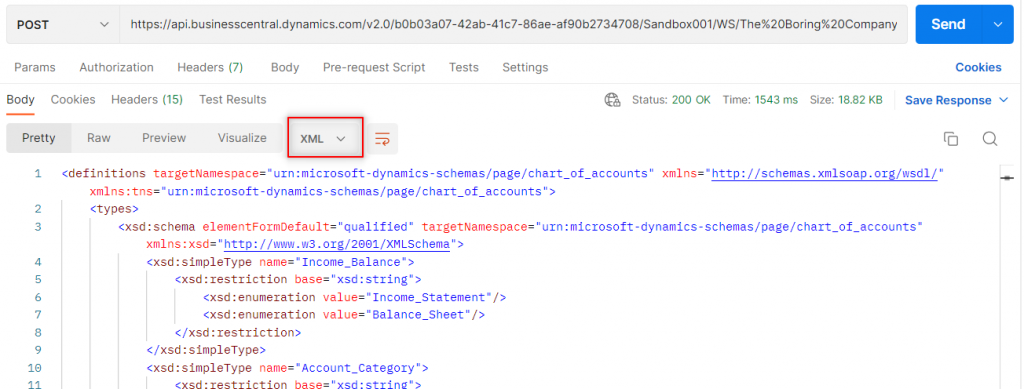
Let´s use the SOAP URL from the web services page of Business Central.
As we can see, we receive an XML. However, the data is not there, it´s only the schema, the structure.
Find more information about XML schemas here:
XML Schema Tutorial (w3schools.com)
To get the information, you need to add a header.
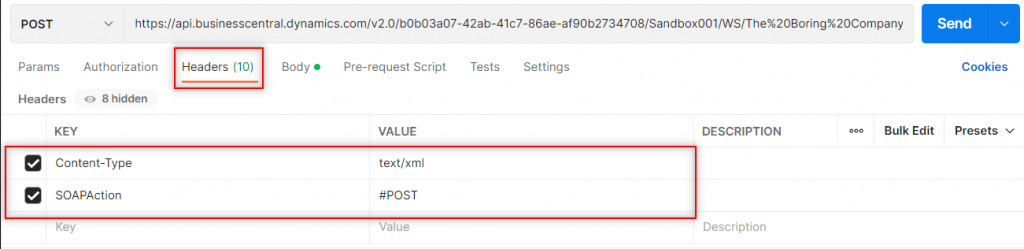
You also need a body. The body will depend on the request you want. To add a body we need to see the operations that can be made with the received XML.
To see them, download the schema from Postman.

And upload it to the following site:
https://www.wsdl-analyzer.com/
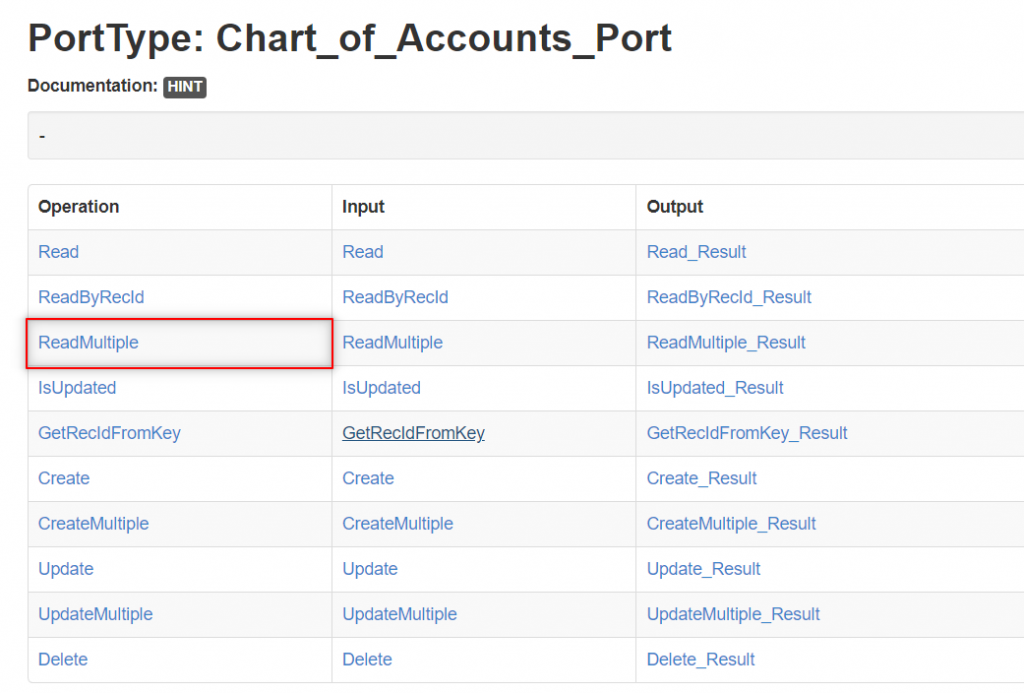
The site will analyze the schema and offer the operations available. We will use ‘ReadMultiple’ to get all the accounts from the chart of accounts:
The body will be shown below:
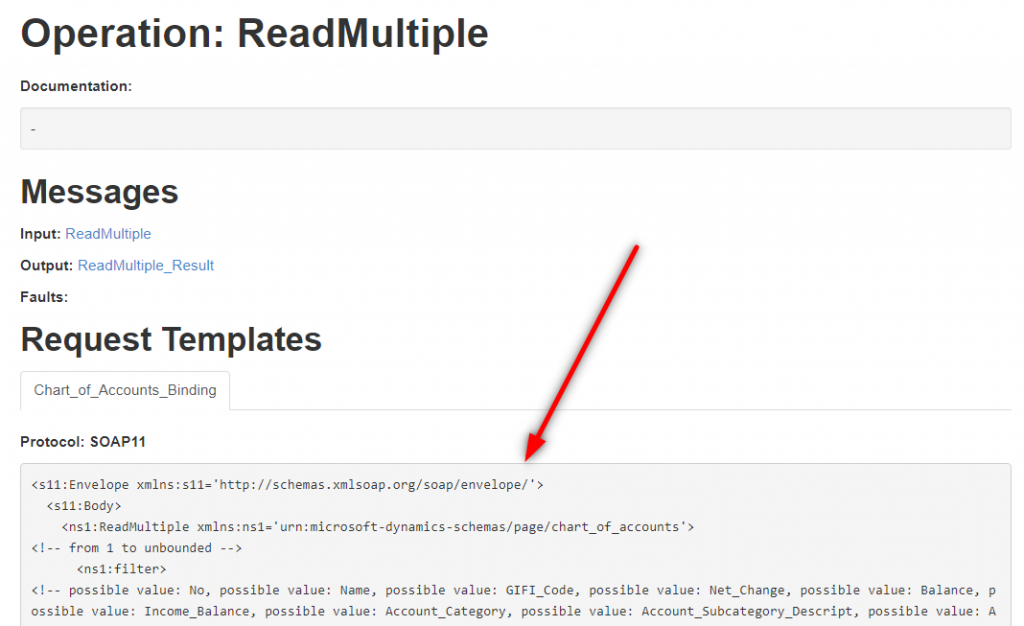
Paste it to the body section. Selecting raw XML. This is what it looks like:
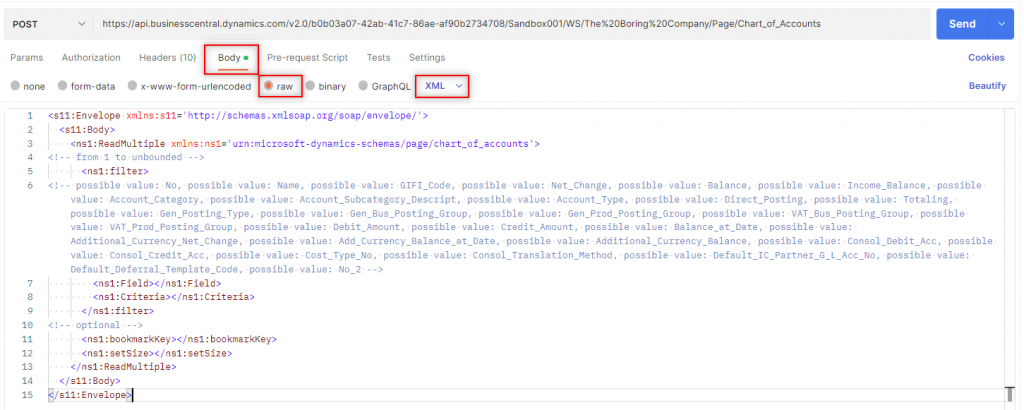
Cleaned up, you can see it here:
<s11:Envelope xmlns:s11='http://schemas.xmlsoap.org/soap/envelope/'>
  <s11:Body>
    <ns1:ReadMultiple xmlns:ns1='urn:microsoft-dynamics-schemas/page/chart_of_accounts'>
      <ns1:filter>
        <ns1:Field></ns1:Field>
        <ns1:Criteria></ns1:Criteria>
      </ns1:filter>
      <ns1:bookmarkKey></ns1:bookmarkKey>
      <ns1:setSize></ns1:setSize>
    </ns1:ReadMultiple>
  </s11:Body>
</s11:Envelope>
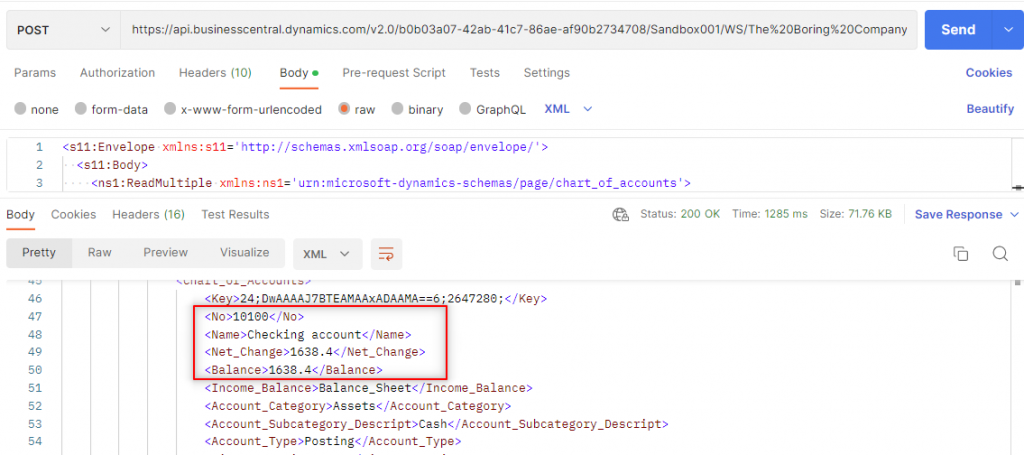
Click on ‘Send’ again, you will be able to see the information now.
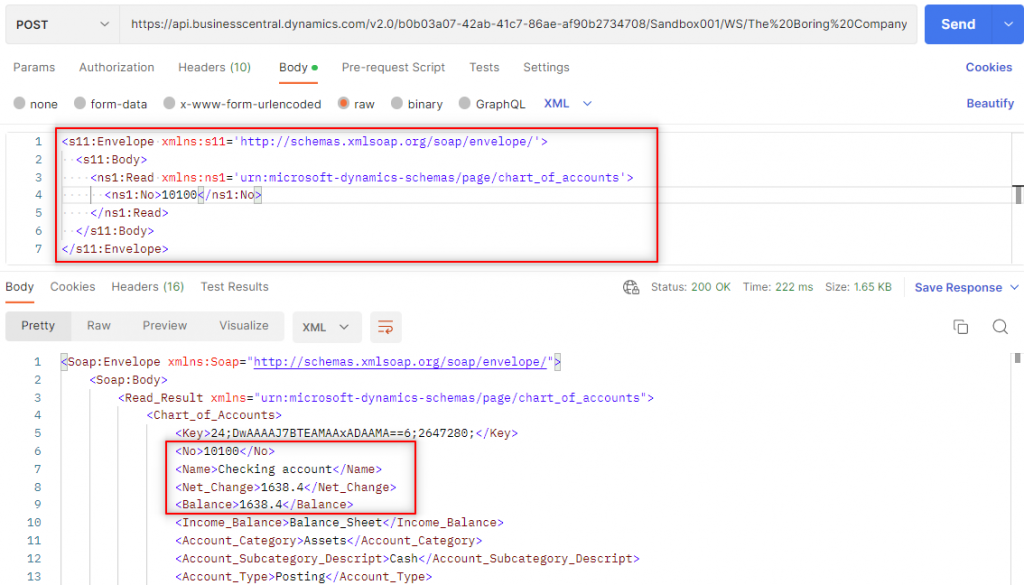
If we just want one account, we can use Read:
For further information about APIs, SOAP and the differences between OData follow the article below.
Conclusion
Postman is a great tool for testing Business Central APIs and web services. The part that involves more steps is setting up OAuth. But after that, Postman is quite simple to use.
The next steps are to start learning how to use the different methods (GET, POST, PUT, PATCH, DELETE) to interact with Business Central APIs.
In following articles, we will learn how to use them with standard APIs. As well as how to create custom APIs.
That´s all. Hope you find it helpful.
Great post,
thank you.
Thanks!
Good post. thanks.
keep posting
Many thanks!
I exactly did what you suggested but when i am trying to call from angular mobile app .i am getting the cross origin error.can you tell where i am doing wrong.
Thanks
Hi, I’d suggest to first connect with Postman. Then change to your application. Personally I’ve never used angular. But if you can connect with Postman you should be able to do the same in your app.
If you have any more queries send me an email at alberto.soben@businesscentralgeek.com
Its working fine with postman but when i am trying to send a request from angular app ,its giving me the cross origin error
I don’t know about angular, I can’t help you with that, sorry.
in BC v23.4 the “Azure Active Directory Applications” has changed to “Azure Application Setup”. Do you know if this changes anything dramatically?