
In this article, we will learn to use the REST Client in VS Code to test Business Central APIs. We will start by understanding what REST API is. Then, we will install and set up the REST Client extension in VS Code. We will retrieve an access token and use it in HTTP requests to consume API endpoints.
- What Is REST API
- The REST Client Extension For VS Code
- How To Use The REST Client For Business Central
- Get Access Token
- Using The Token
What Is REST API?
REST is a popular architectural style for building web services, it’s lightweight, scalable, and flexible. In short, it allows different software systems to communicate with each other in a standard way over the internet.
Business Central APIs work on REST. So, we can use available tools to test API requests such as Postman, PowerShell, or the REST Client from VS Code.
The REST Client Extension For VS Code
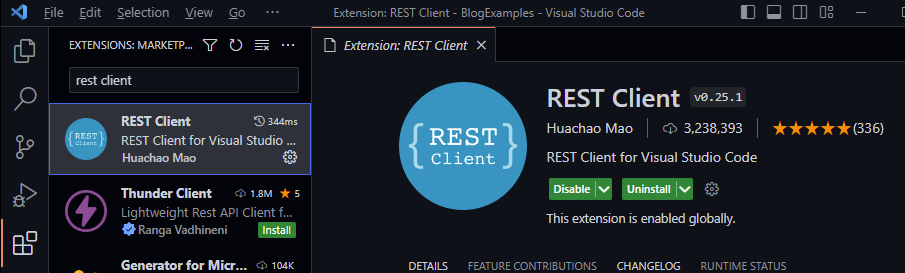
The REST Client is an available extension from VS Code that enable to test Business Central APIs. This is an alternative to Postman, with the advantage that we don´t need to leave VS Code to try them.
To install the REST Client extension, search for ‘rest client’ in the VS Code marketplace and install it. It will be the first extension to appear.
How To Use REST Client For Business Central
To test API requests, we will follow a similar process to what we do in Postman. However, before proceeding, we need to set up the authentication method. In this case, we are using OAuth, which requires several steps for proper configuration. For detailed instructions on setting up OAuth and using Postman, please refer to the article linked below.
Get Access Token
After setting up OAuth, the first thing to do to test a Business Central API is to get the access token. An access token contains the permissions needed to access the APIs. The token will be used for every API request we make.
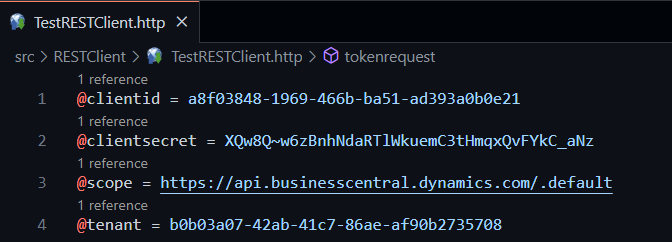
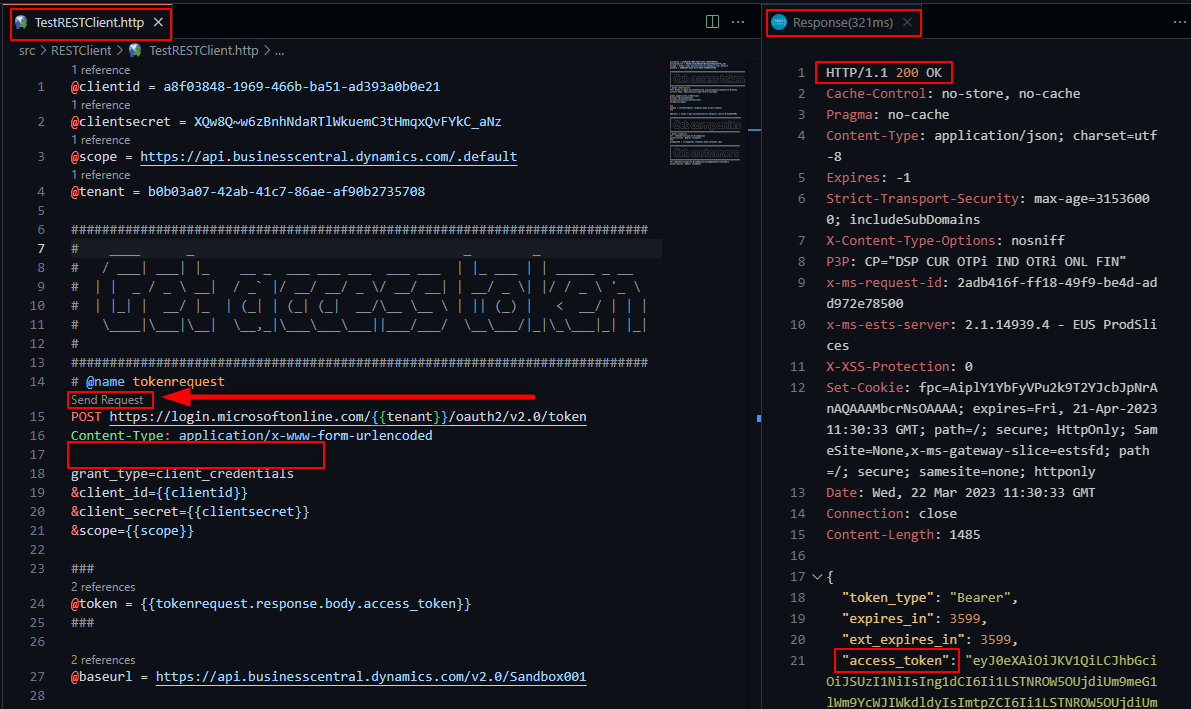
Create an ‘.http‘ file, in the example we are following it´s called ‘TestRESTClient.http’. You can define variables with the ‘@’ in front of the name so we can use them later when sending the requests.
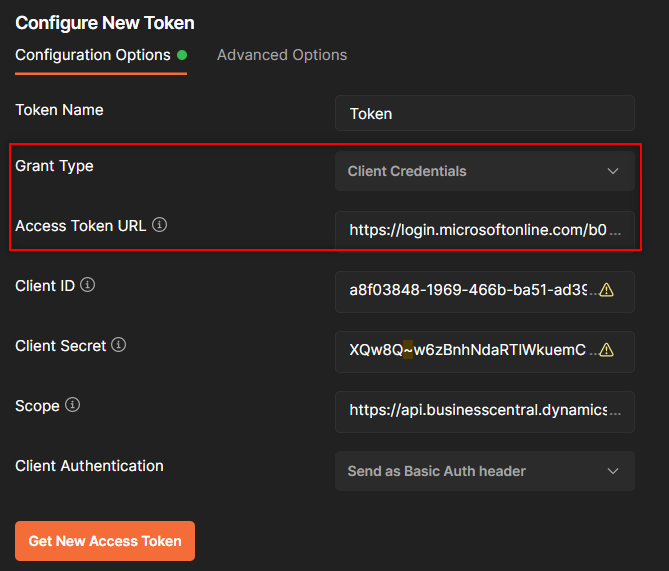
We will define 4 variables to authenticate. Client Id, Client Secret, Scope, and Tenant.
- Client Id and Client Secret are retrieved from Azure when setting up OAuth.
- The scope is the URL you see below.
- The tenant will be the tenant id of Business Central.
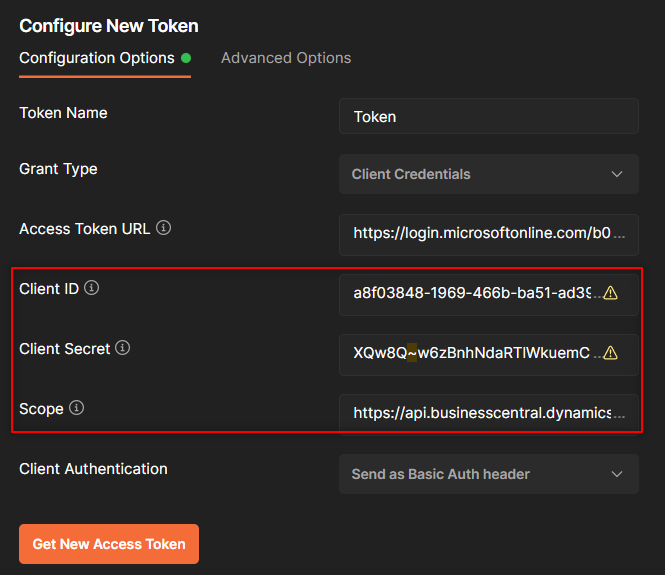
If you are familiar with Postman, you will recognize these fields, as they are the same values to enter when configuring a new token.
Complete the request with the following code. You can see the ‘POST‘ method that is used to retrieve the token. Note that you should also specify the grant type, which is client credentials.
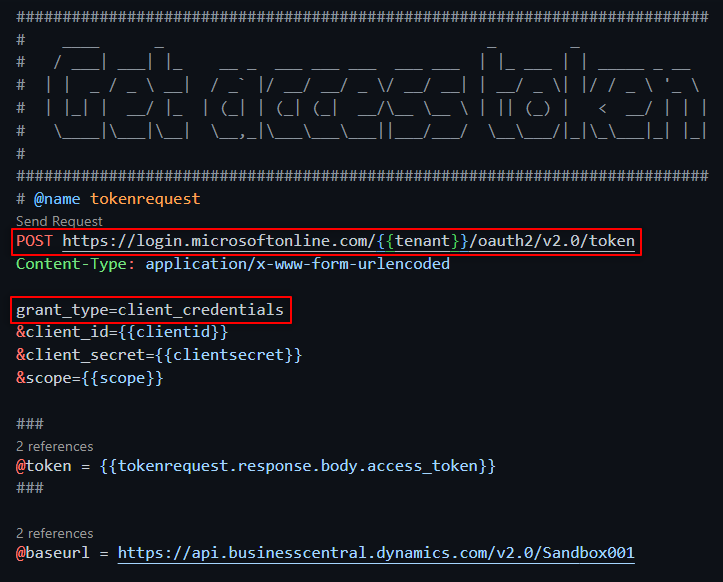
These are the two fields left from Postman:
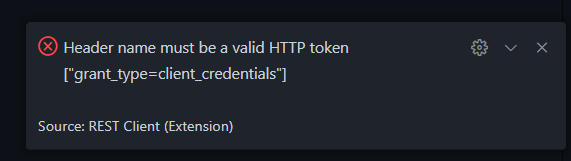
Click on ‘Send Request‘ above the POST method. Note the blank space between ‘Content-Type’ and ‘grant_type’. The REST Client shows an error if you don´t leave a blank space between them.
You will receive a ‘200 OK’ response with the access token if everything was set up correctly. A window will open showing the whole response.
Using The Token
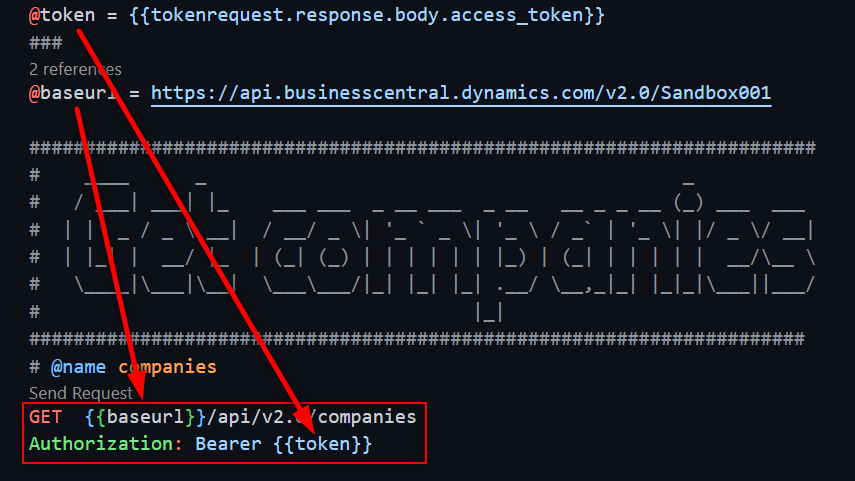
Let´s use the token now. It has been saved into the ‘@token‘ variable with {{tokenrequest.response.body.access_token}}
We will use a simple endpoint to retrieve the companies from ‘Sandbox001’:
https://api.businesscentral.dynamics.com/v2.0/Sandbox001/api/v2.0/companiesIf you want, you can build the API endpoint, for this case we use the ‘@baseurl‘ variable and add ‘/api/v2.0/companies‘.
Also, add ‘Authorization: Bearer {{token}}‘ like in the following image. It will hold the token value retrieved from above.
After the request is sent, we will receive a list of companies for ‘Sandbox001‘. In this case, they are called ‘CRONUS USA, Inc.’ and ‘The boring company’:
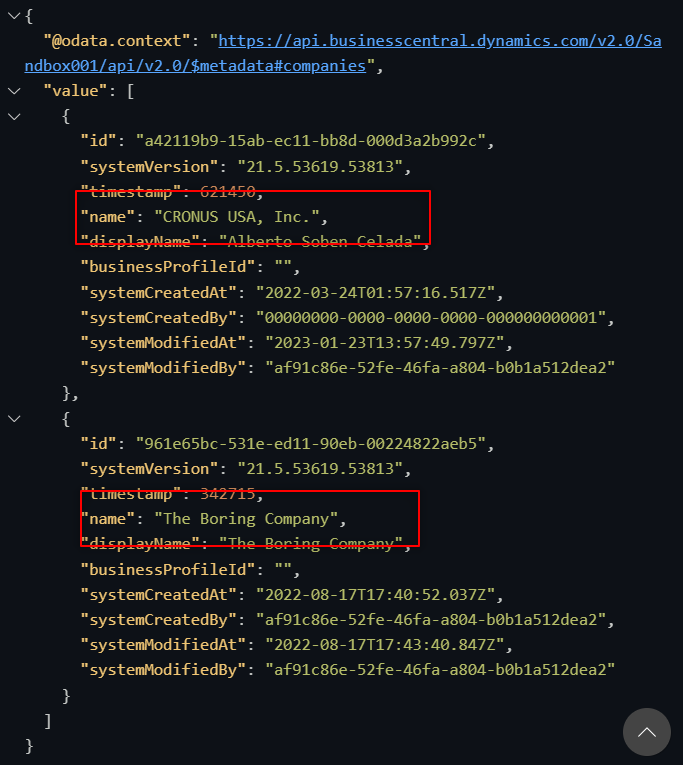
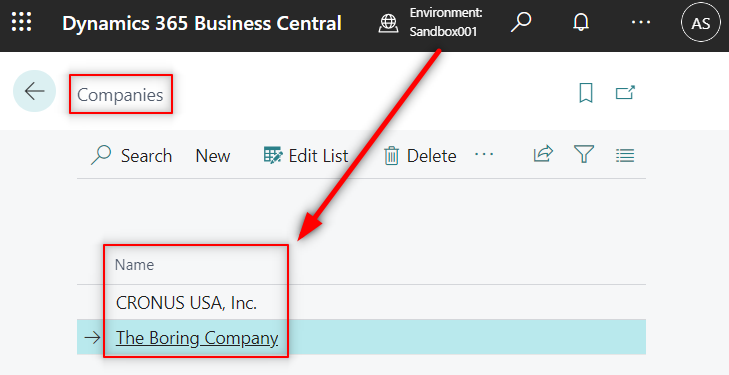
If we check the data from Business Central we can see both companies.
This is just the beginning, you can create more complex requests and start playing with the REST client from VS Code. The advantages I see of using it above Postman are that you can have multiple requests in one file and not leave VS Code to test requests. Postman can be a little difficult to navigate at first.
The disadvantage is that you need to learn a “new language” in order to create variables, assign values from requests, etc. Also, Postman has a better way to structure requests in projects and folders.
Thanks to AJ for explaining this method in his blog, the example is from his post. Don´t forget to check it, he explains in detail these steps in the REST client. Also, he teaches how to use PowerShell to test requests.
Source code:
@clientid = a8f03848-1969-466b-ba51-ad393a0b0e38
@clientsecret = XQw8Q~w6zBnhNdaRTlWkuemC3tHmqxQvFYkC_aNu
@scope = https://api.businesscentral.dynamics.com/.default
@tenant = b0b03a07-42ab-41c7-86ae-af90b2754708

###########################################################################
#    ____      _                                   _        _
#   / ___| ___| |_    __ _  ___ ___ ___  ___ ___  | |_ ___ | | _____ _ __
#  | |  _ / _ \ __|  / _` |/ __/ __/ _ \/ __/ __| | __/ _ \| |/ / _ \ '_ \
#  | |_| |  __/ |_  | (_| | (_| (_|  __/\__ \__ \ | || (_) |   <  __/ | | |
#   \____|\___|\__|  \__,_|\___\___\___||___/___/  \__\___/|_|\_\___|_| |_|
#
###########################################################################
# @name tokenrequest
POST https://login.microsoftonline.com/{{tenant}}/oauth2/v2.0/token
Content-Type: application/x-www-form-urlencoded

grant_type=client_credentials
&client_id={{clientid}}
&client_secret={{clientsecret}}
&scope={{scope}}
###
@token = {{tokenrequest.response.body.access_token}}
###
@baseurl = https://api.businesscentral.dynamics.com/v2.0/Sandbox001

#######################################################################
#    ____      _                                           _
#   / ___| ___| |_    ___ ___  _ __ ___  _ __   __ _ _ __ (_) ___  ___
#  | |  _ / _ \ __|  / __/ _ \| '_ ` _ \| '_ \ / _` | '_ \| |/ _ \/ __|
#  | |_| |  __/ |_  | (_| (_) | | | | | | |_) | (_| | | | | |  __/\__ \
#   \____|\___|\__|  \___\___/|_| |_| |_| .__/ \__,_|_| |_|_|\___||___/
#                                       |_|
######################################################################
# @name companies
GET  {{baseurl}}/api/v2.0/companies
Authorization: Bearer {{token}}
That´s all. Hope you find it helpful.
Hey.. I am new and learning this has really helped but can you do the same for
Content-Type: application/JSON
You can find more API examples in my blog!