
Tables are the foundation of Microsoft Dynamics 365 Business Central. They are essential for organizing and storing data. There are different types for different purposes. In this guide, you will learn how to create 5 of the most common tables. Along with their pages and the most important properties.
- Setup Table
- InsertIfNotExists
- Master Data Table
- Document Header Table
- No. Series
- Document Line Table
- AutoSplitKey
- Ledger Entry Table
- AutoIncrement
- AutoIncrement
Setup Table
The setup table is a simple table. It only consists of one record. The only thing to keep in mind is that we need to insert the record if there is none already.
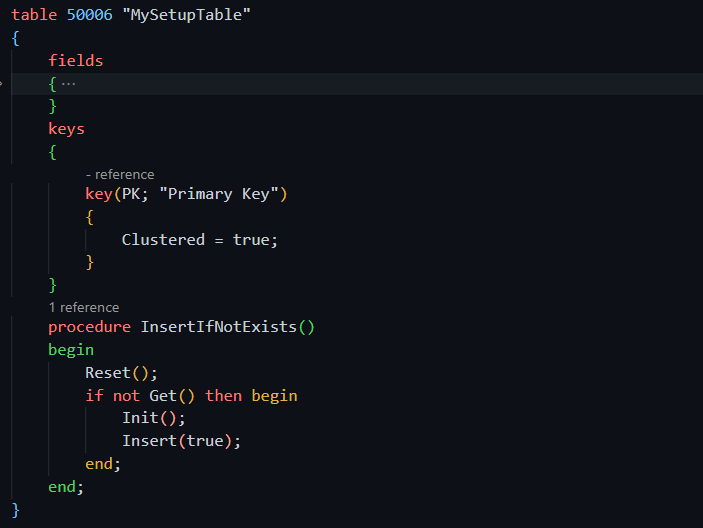
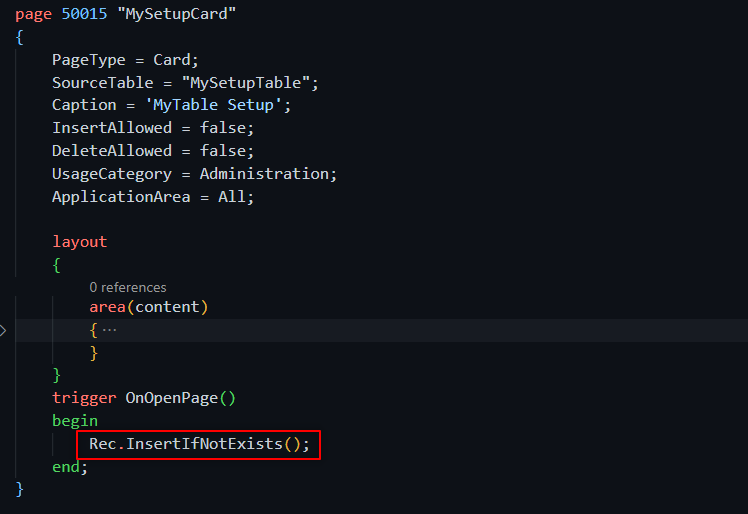
On the page, make sure to call ‘InsertIfNotExists()‘ method from the table. This will insert the record for the first time when we open it. This is what it looks like:
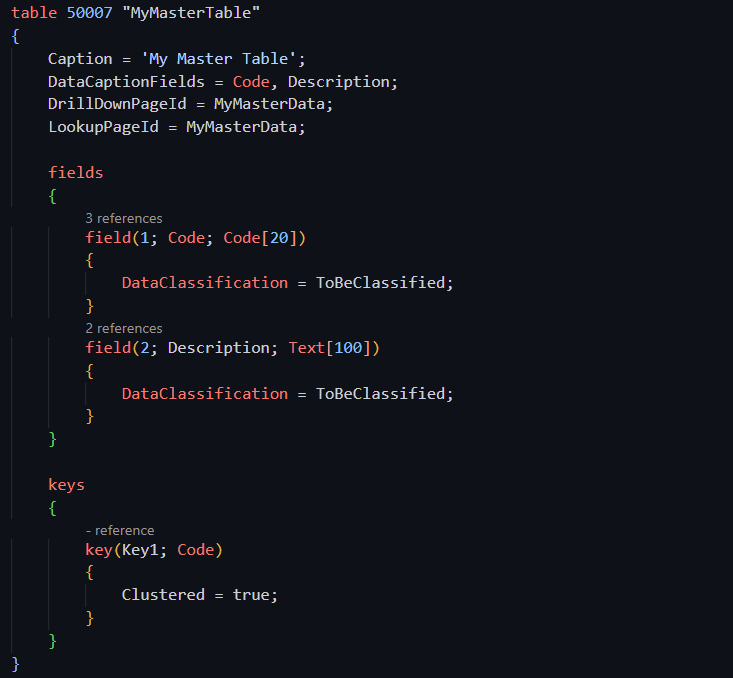
Master Data Table
The master data is one of the simplest tables. You only need a DrillDown page and a lookup page. You can use the same page for both or use a different one for each case.
For some master tables like customers, vendors, etc, you should use a no. series. You can find out how to add a no. series in the next section.
Document Header Table
You usually want documents to follow a specific number series. We need to control the OnValidate and the OnInsert triggers on the header.
OnValidate ‘No.’: we will test that the number can be changed manually. Looking into the configuration of the No. series.
OnInsert: we will get the next number series with the help of the ‘NoSeriesManagement‘ codeunit.

You can easily get a document table with the snippet called rtableNoSeries from the AL Toolbox (ALTB) extension. This is the one from the example above.
You want to add more control to the header table. For example, deleting the respective lines when the header is deleted.
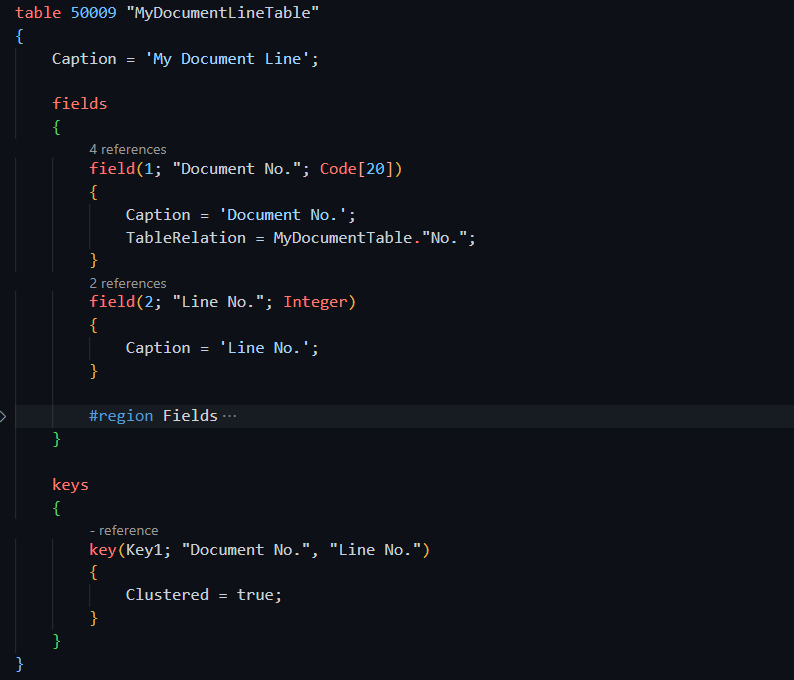
Document Line Table
You want a field like ‘Document No.‘ to be the same as the one on the header. This way, we can link lines with their headers. Also, document lines need a line number. So the primary key will be ‘Document No.‘ and ‘Line No.‘.
Now, how do we create the page?
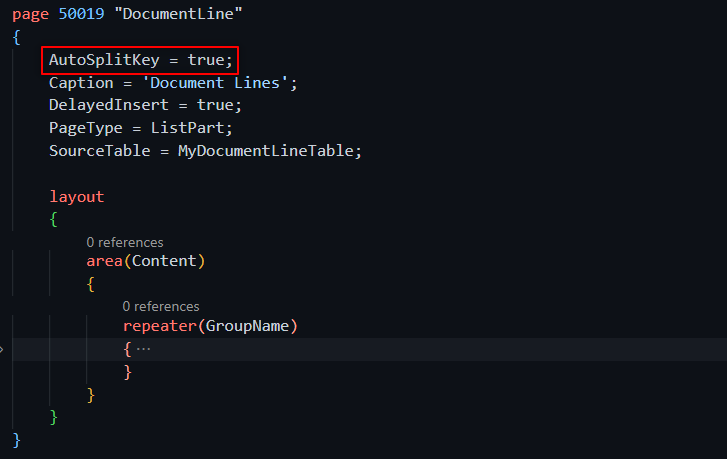
The most important property is ‘AutoSplitKey‘. This property will automatically generate a key. And it will insert it between the current record and the previous record.
The last member of the primary key must be an integer, decimal, or GUID for this property to work.
Get more information about it here:
Here is a video test where you can see how line numbers are automatically generated. For example, this is how journal lines work in the base app:
We can combine the ‘AutoSplitKey’ property with the ‘MultipleNewLines‘. This property will create new lines between the last record and the current record.
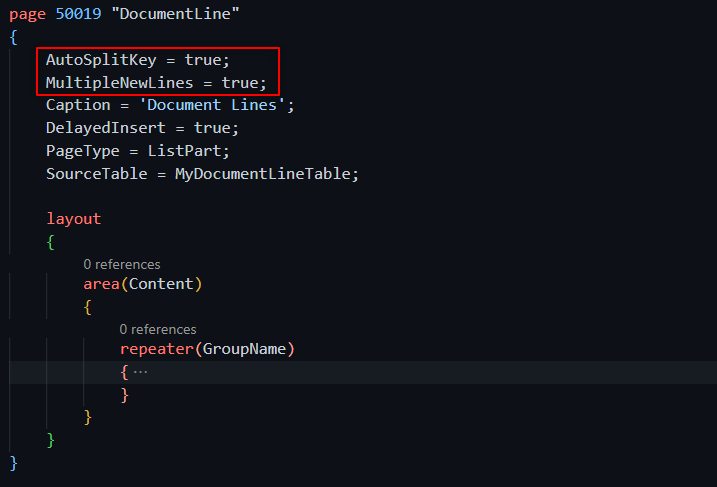
See how it works in this video. Note that the grid is now ‘open’, we can write in every line and new line numbers will be automatically added. This is how sales and purchase lines work in the base app.
Find more information about this property here:
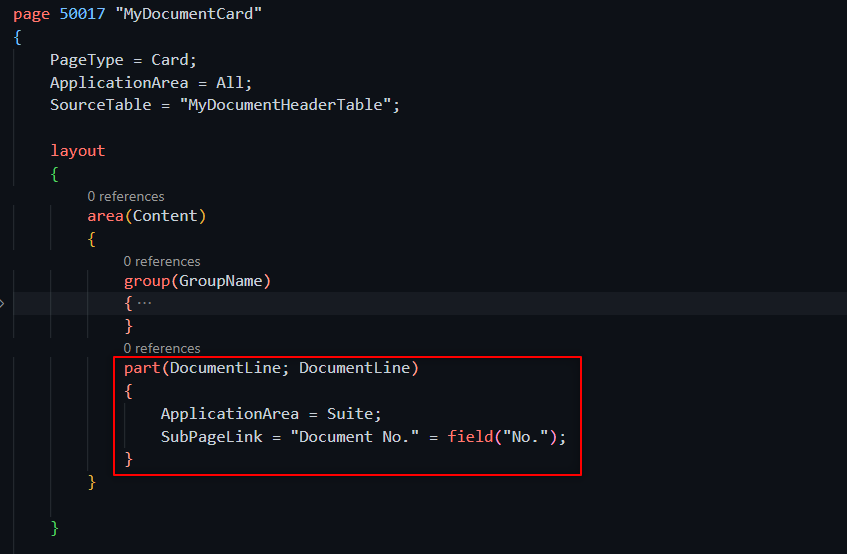
You can link the lines and the header with the ‘SubPageLink‘ property. This is how a document card is created, similar to a standard order in Business Central.
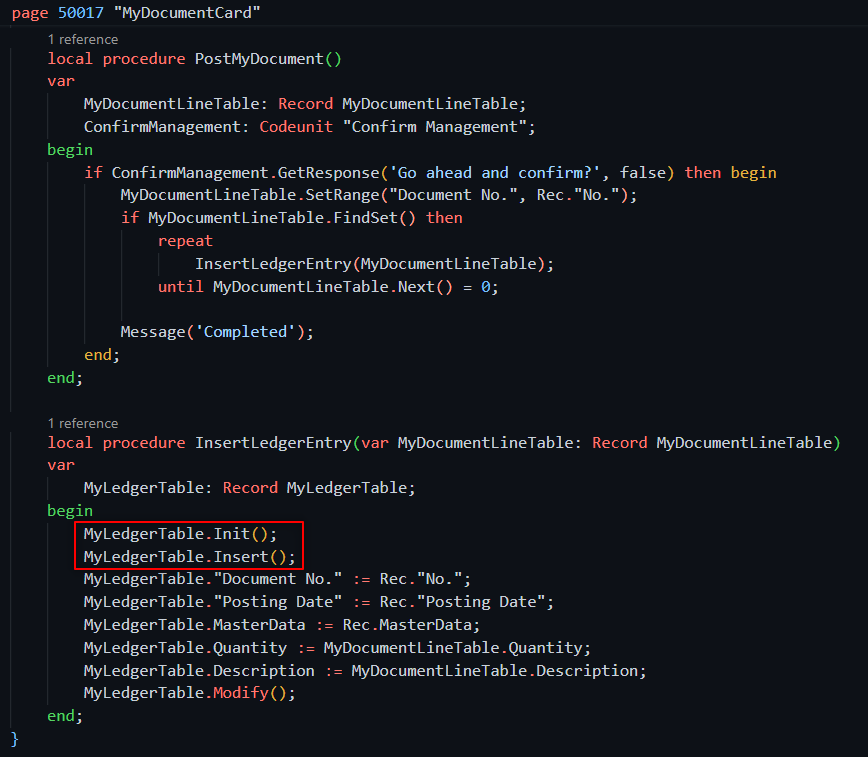
Ledger Entry Table
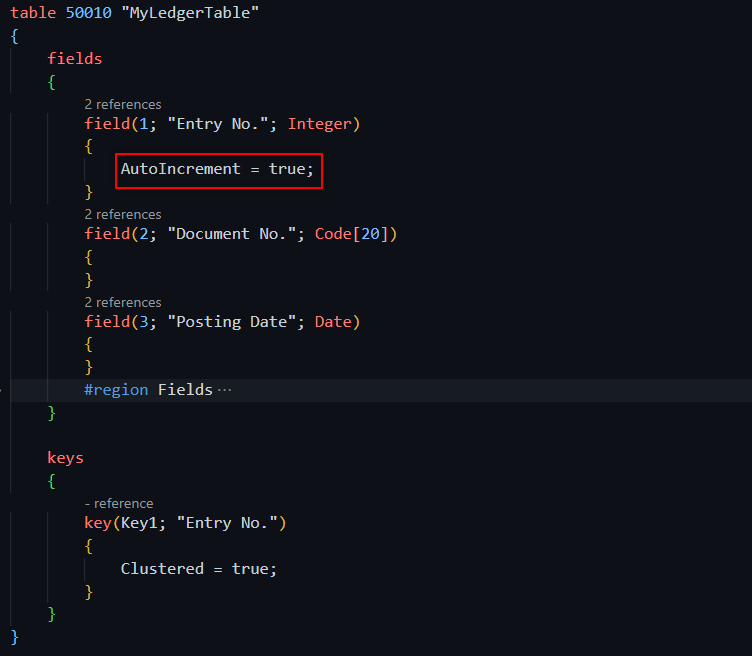
You can use the autoincrement property to generate an entry number automatically. This is better for performance rather than manually looking for the last entry and adding one.
It´s a good approach when you don´t need to have a consecutive number of entries.
This is because you can end up getting wholes in the sequence. If errors occur during the creation of an entry and there is an error, the entry number will be lost. So keep that in mind.
We will see an example by posting the document to the ledger table. This is a very basic example of how the record is inserted. Note that we do the Init and Insert without specifying a primary key.
Video test:
Finally, we have the structure, we just need to add the logic. If you want to learn 7 tips to improve performance in Business Central follow the article below:
That´s all. Hope you find it helpful.
great content, would love to see the same for other types of tables too.
thanks!