In Microsoft Dynamics 365 Business Central the Role Center plays a big part. It´s the first page users see when accessing the system. If we can make it beautiful and intuitive the user experience will be better. In this post, we will create a friendly user interface built into the role center.
- Introduction
- The Configuration Table
- The Grid CardPart
- Embedding Into The Role Center
Introduction
In this post, we will use blob fields to create an intuitive role center to access some pages in the sales module. This approach can be replicated and create other types of usage.
Keep in mind that Blob fields aren´t as fast as Media fields, and could slow down the loading of the role center. But this is the only way to show images in the role center (as far as I know) without a Java Script control addin.
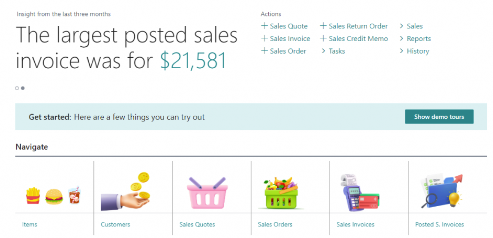
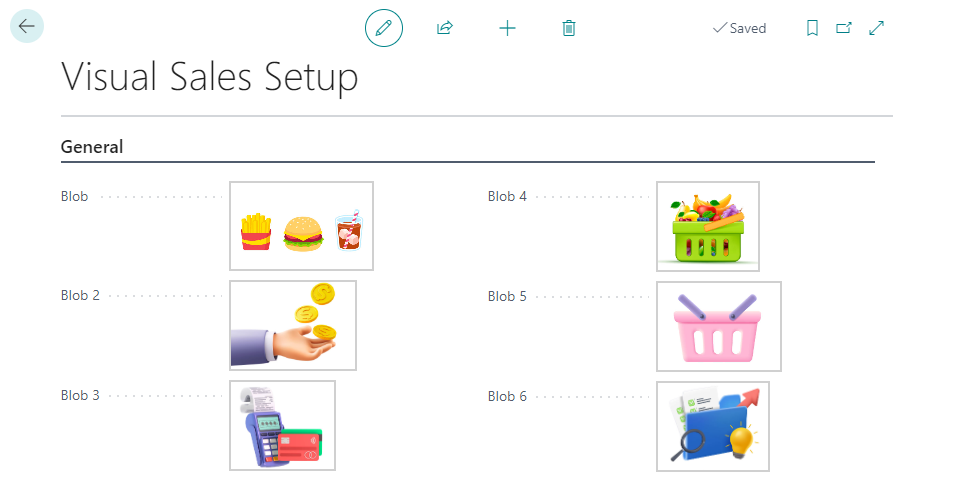
In this example, the sales processor team will have an image for items, customers, sales quotes, orders, invoices and posted invoices. And, on each image, they will be able to navigate to them. After some easy steps, this will be the look of the role center:
The Configuration Table
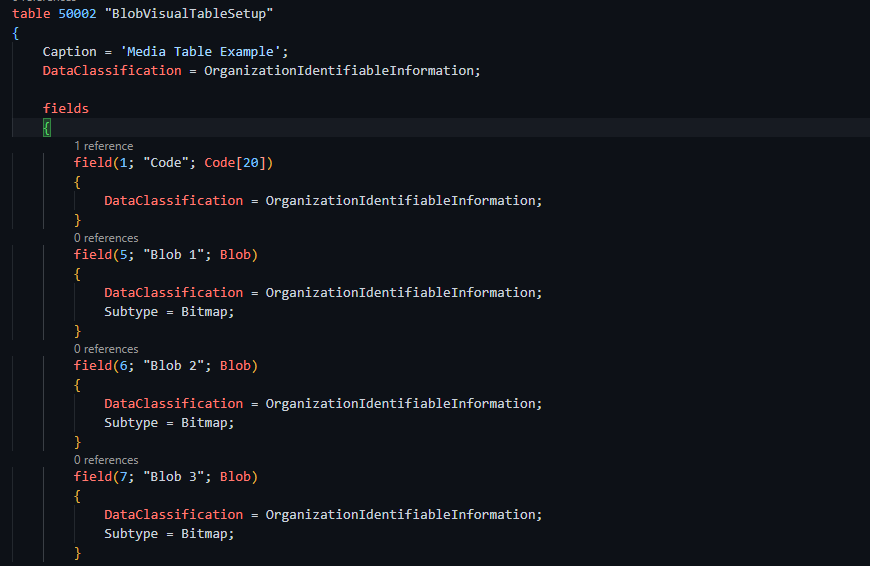
The first thing we need is to create a table to store the images. We will create a blob field for each image. Also, make sure to set the ‘Subtype’ property to ‘Bitmap’.
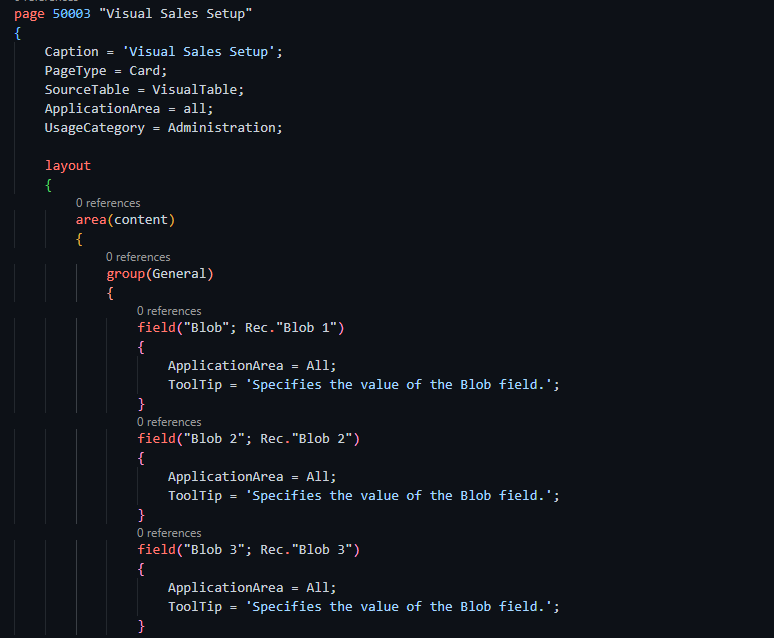
Now, we need a card page to upload the images
From Business Central, we can now add the images to use:
The Grid CardPart
First, to embed a page into a Role Center we need to create a CardPart, in this case.
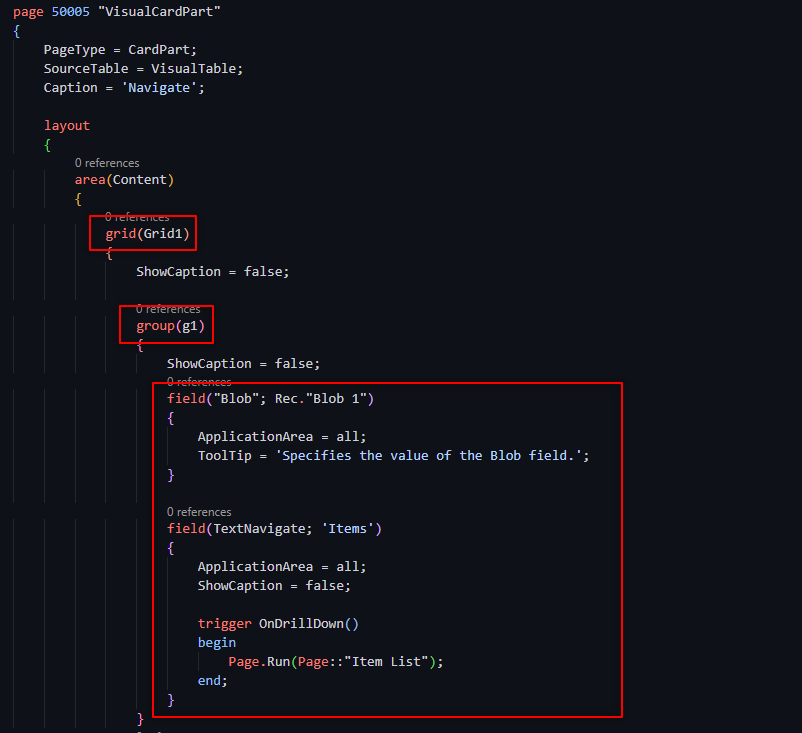
The key is to use a grid to create the look from above. And, within the grid, use a group for each image. Now, each group will have two fields, the blob and a caption.
It´s not possible to navigate directly in the blob field but we can add a caption and drill down on it.
In the following image you can see there is a “Blob 1” field and a ‘Items’ field with an ‘OnDrillDown’ trigger.
Note that the first field corresponds to the first created table. The caption, however, it´s not a field from the table, it´s just a field with a caption created just in the page.
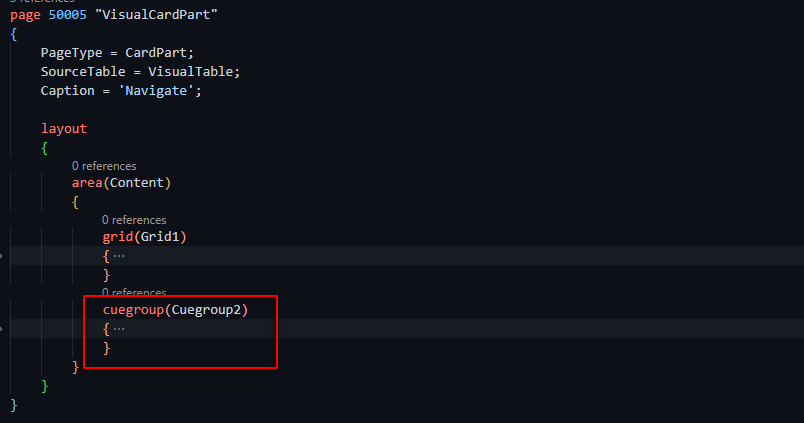
For rendering purposes, the trick is to add a cuegroup with at least one field inside. In the next section you will know why. Any field within the cue will do, even a blank field.
Embedding Into The Role Center
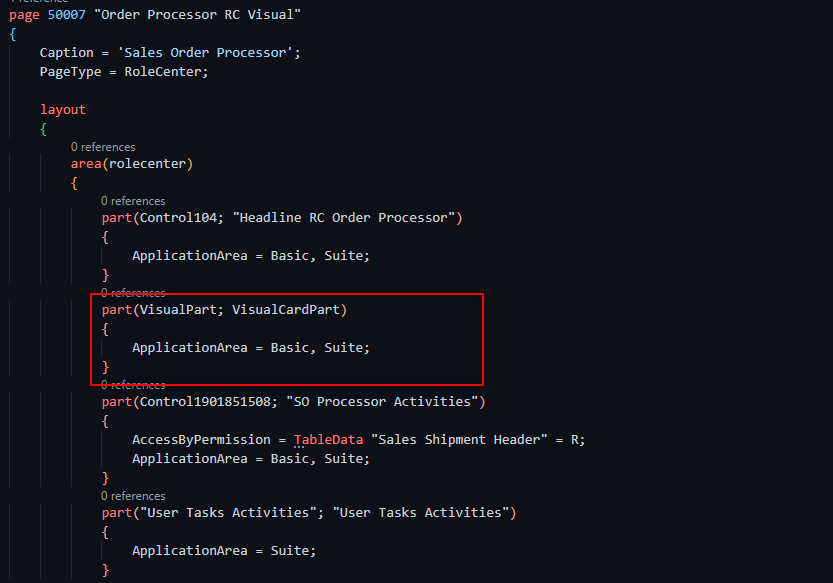
For this example, we will create a new role center, copying the standard ‘Sales Order Processor’ and adding a part area below the ‘Headline’ part. Finally, set the CardPart just created in this section.
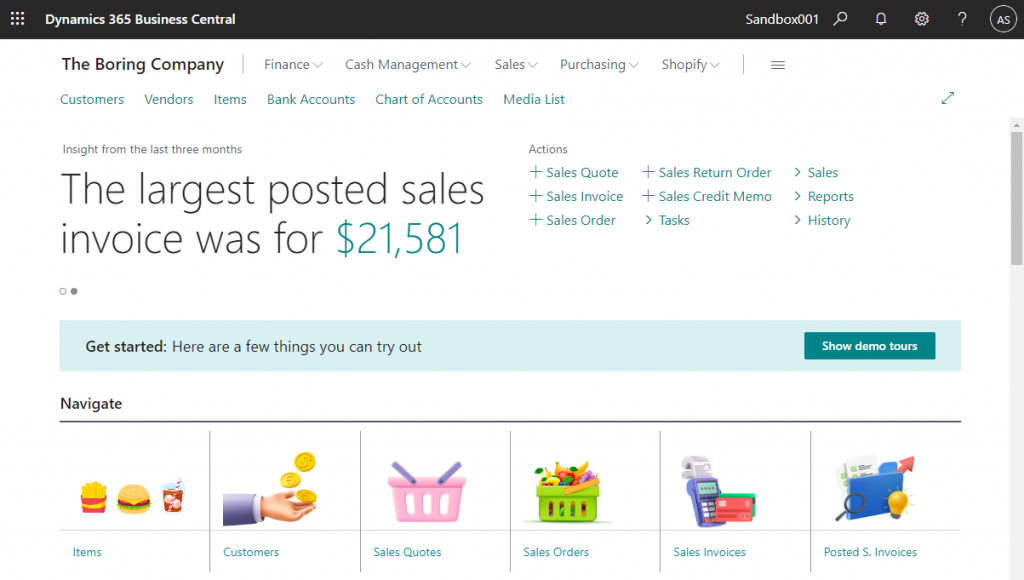
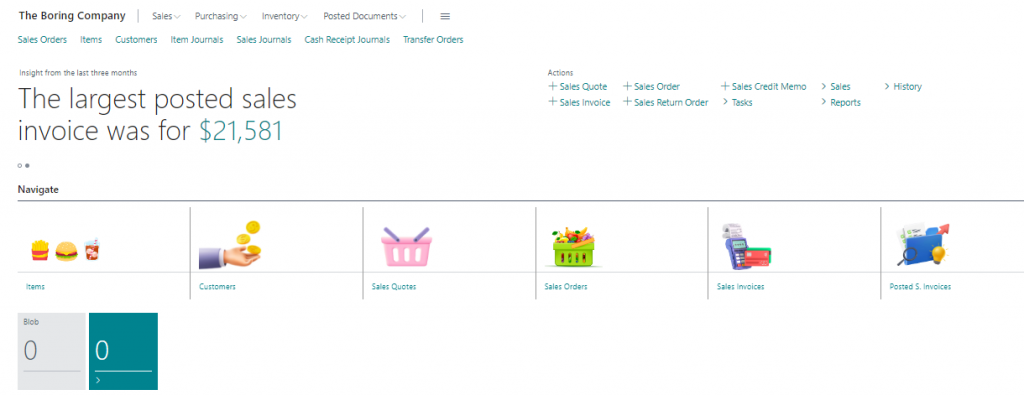
Once ready, we can see the result in Business Central. Without the cuegroup the images renders like the following. While the result it´s not too bad, a blank space is created below the images and we can’t use it for other purposes.
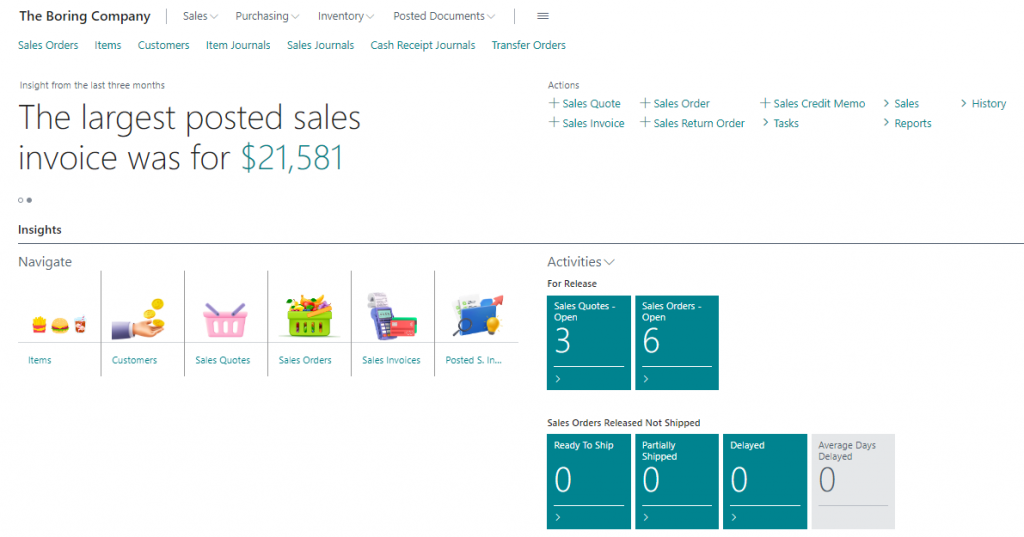
The same page with the cuegroup added on it shows a larger group and the images are also bigger. Overall, easier to see and we can use the cues to add some extra information to help the sales team. This way, we can use the blank space below:
Video demo:
If you want to learn about cues and how to create them make sure to check the article below.
That´s all. Hope you find it useful.
I like the splash of colour. Great article!
Thank you very much!