
Excel is one of the most used tools worldwide. In this post, you will learn 7 tips to export data from Business Central to Microsoft Excel. Also, you will learn how to connect OData Feed and Power Automate to Business Central.
- Open/Edit In Excel
- Copy/Paste Rows
- OData Feed
- Power Automate
- Configuration Packages
- Excel Buffer
- Excel Report
Open/Edit In Excel
The fastest way possible to export data to Excel is via the built-in tool Business Central has on every list page. You will find the symbol in the top right corner.
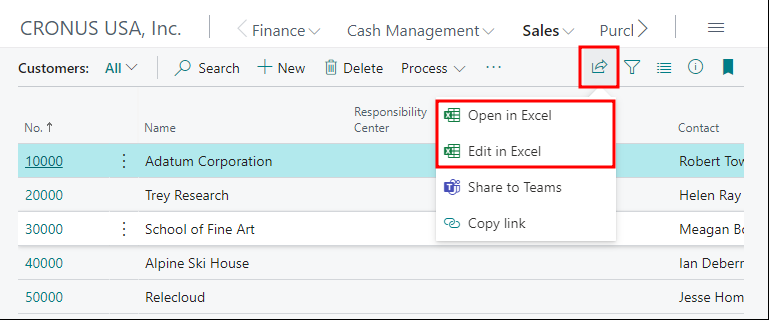
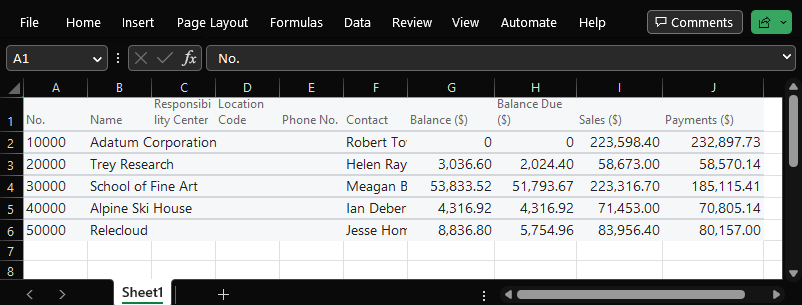
If we choose ‘Open in Excel’, a file will be downloaded, for example:

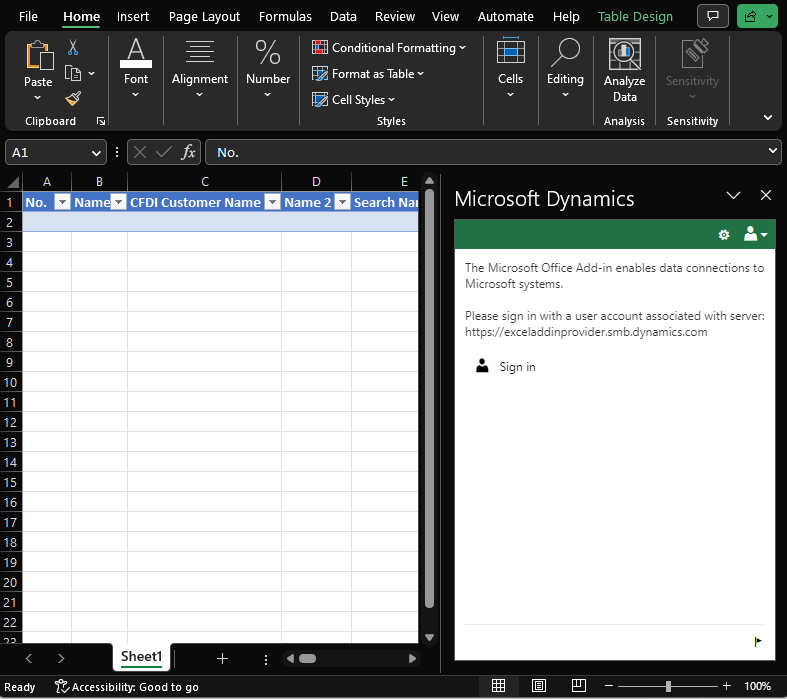
If we choose ‘Edit in Excel’, we will need to sign in to the Microsoft Office Add-in connector. It will appear on the right side like in the following image.
When signed in, the data will be loaded on the sheet. And, on the right pane, you will be able to see these options.
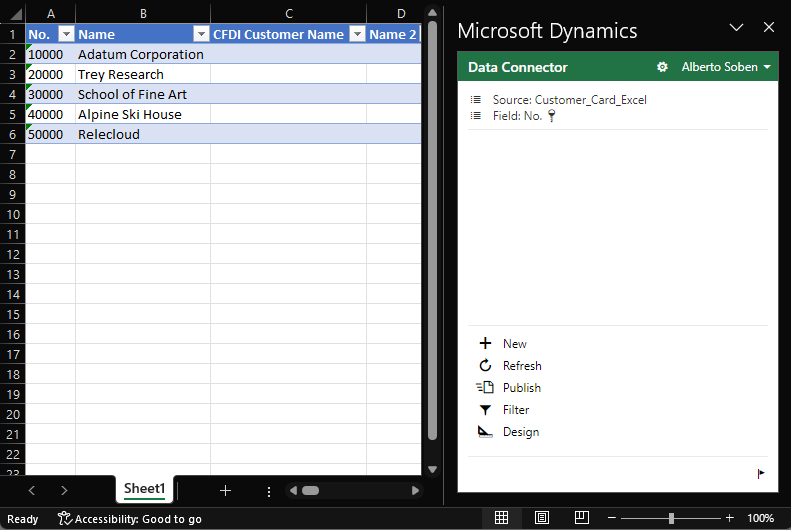
When we make changes on this sheet and click on ‘Publish’, every change will be published to Business Central. That includes inserting, deleting, and modifying data.
Also, when you refresh the file, all changes made in Business Central will be updated on this sheet.
Copy/Paste Rows
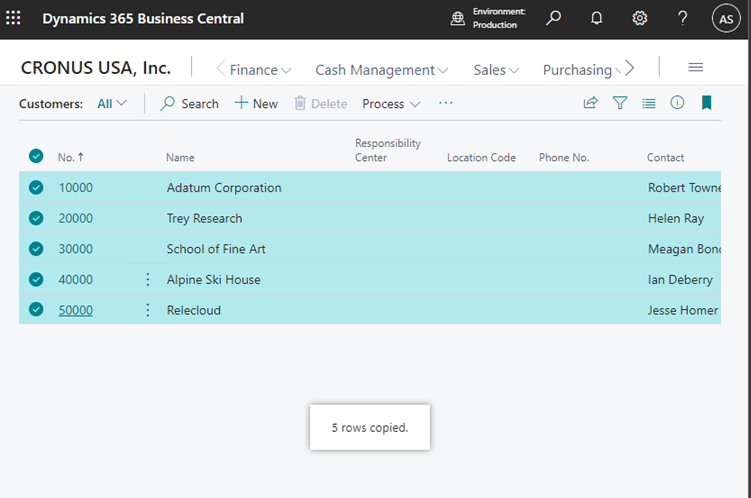
A very easy way is to copy the rows from a Business Central list and directly paste them into an Excel sheet. Select the lines and use ‘Ctrl + C’, you will see a small pop-up like “5 rows copied”.
Then use, ‘Ctrl + V’ on your Excel sheet. This is what it will look like.
OData Feed
Excel has the possibility to connect to Business Central via OData Feed. A data connector from Excel.
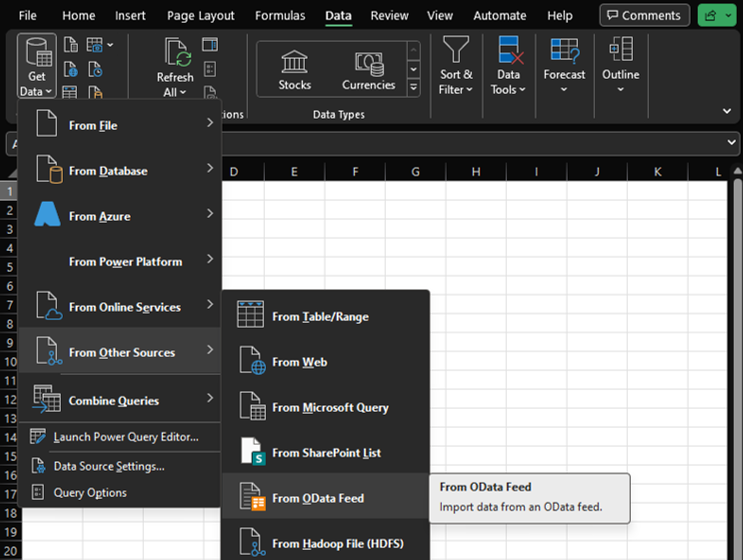
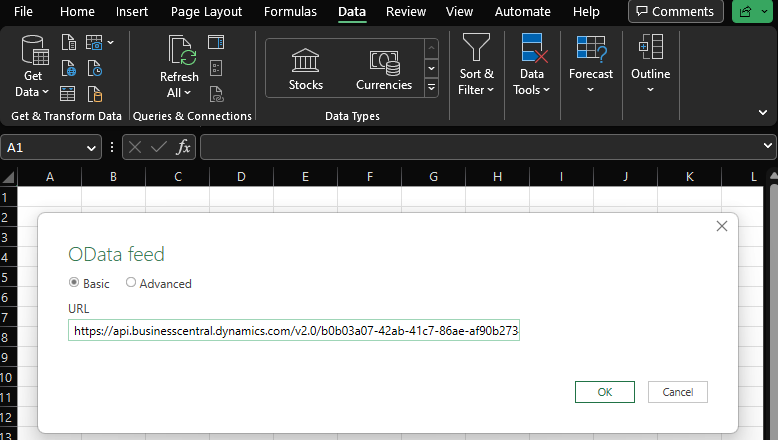
You will be prompted to enter a URL. It will be the endpoint we wish to connect to. We will be connecting to the item table API endpoint.
If you want to learn more about using standard APIs, follow the article below:
How To Use Standard APIs In Business Central – Business Central Geek
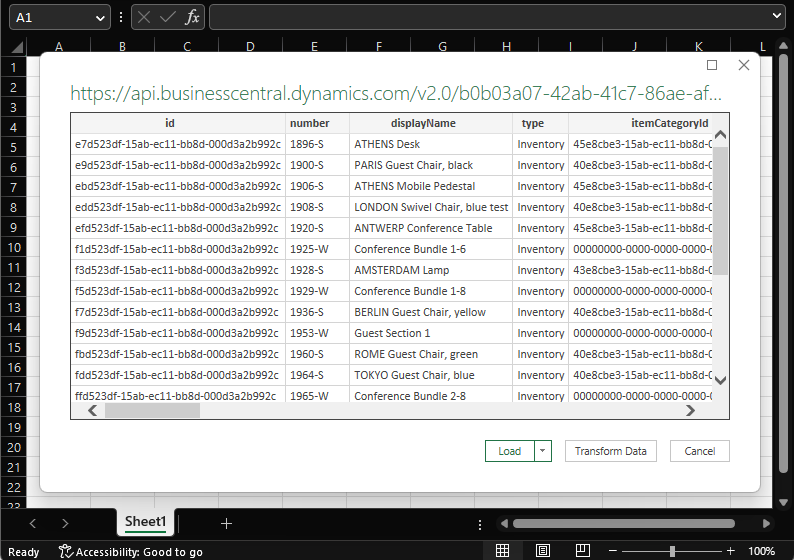
A pop-up window will appear with the data, you can load it or transform it before loading.
After loading, the sheet will look like this. With the query on the right side.

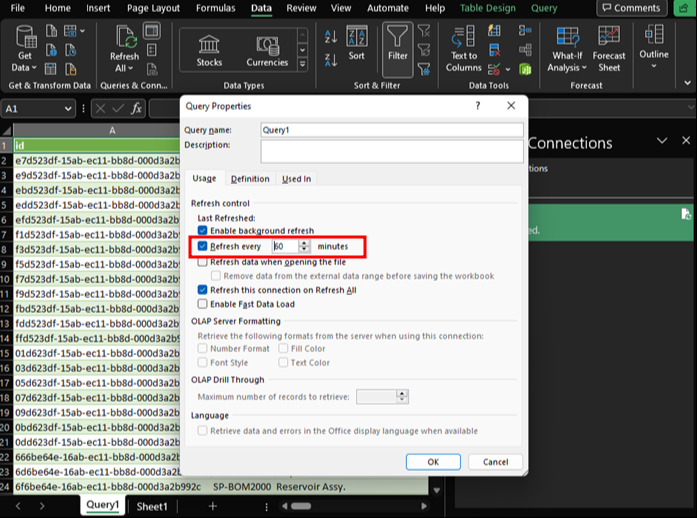
We can also program automatic refreshes for the query. Go to ‘Refresh All’ and ‘Connection Properties…’

We can set up automatic refreshes in the ‘Refresh every X minutes’ field. However, the sheet must be open for the refresh to work. If it’s closed, the data won’t be refreshed automatically.
Power Automate
Power Automate is growing rapidly and has many integrations. With 2 simple steps, we can use it to trigger a workflow and get data to Excel from Business Central. Keep in mind that you will need a license to use the Business Central connector. However, you can use the 90-day free trial to test and create all the workflows you need.
In this example, we will trigger a workflow that will extract data from the item table to an Excel file in OneDrive. Note that you need to have the Excel file available online for Power Automate to access it.
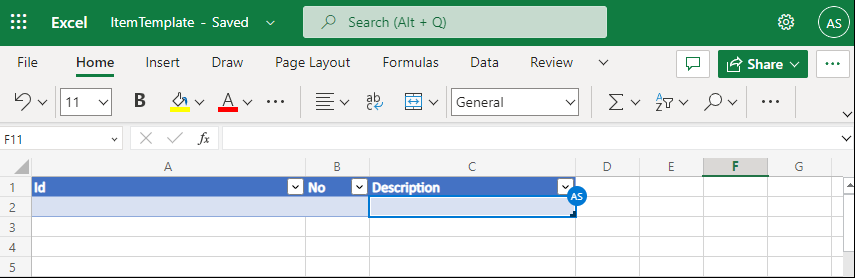
Create a table with the fields you’d like to import into One Drive.
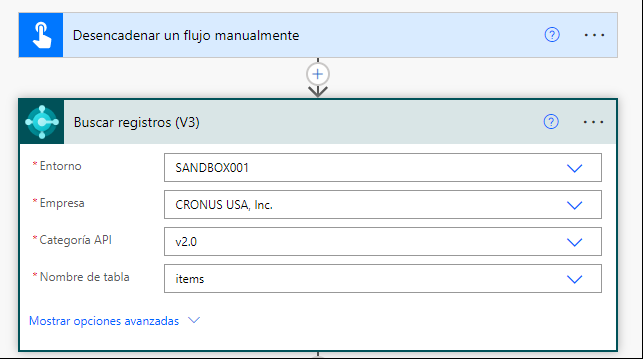
Now, access Power Automate and create a workflow. We will use a manual workflow to test it.
First, we will search for the records using the Business Central connector. You can connect to any environment, sandbox, or production. You can choose the API category and the table to connect to.
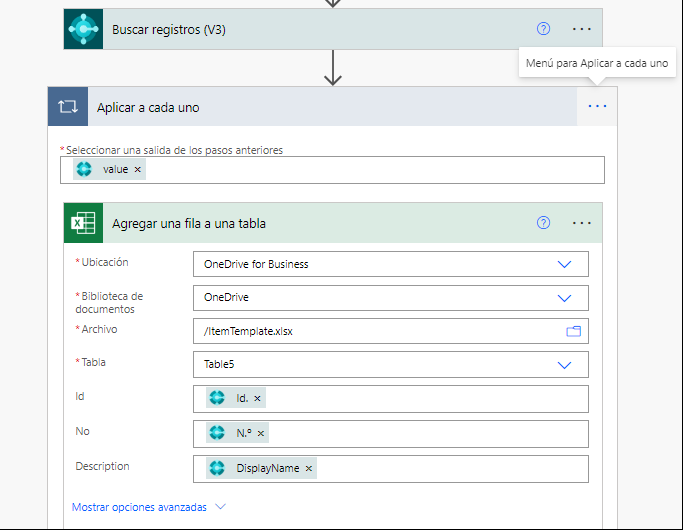
Now, choose the Excel connector and select the option ‘Add a record to a table’.
First, choose the file location. It will be from OneDrive in this example. Choose the file and the table previously created.
The only thing to do left is to map the fields from the Excel sheet to the Business Central fields.
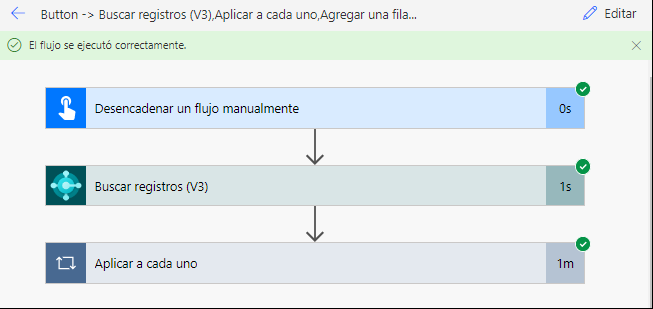
Finally, we are ready to trigger the workflow. If it finished correctly, you will see this result.
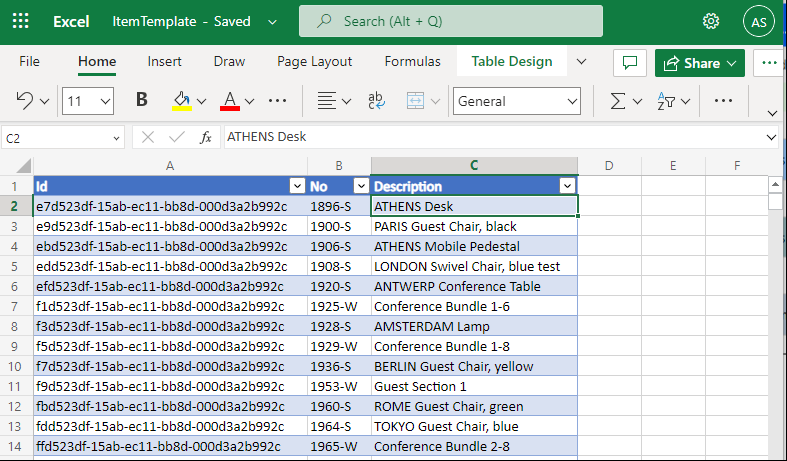
After the workflow is executed we can verify the Excel sheet and check that our data is there.
We can now improve the workflow and trigger it automatically when other events happen, update the records on the table, etc, this is only the beginning!
Configuration Packages
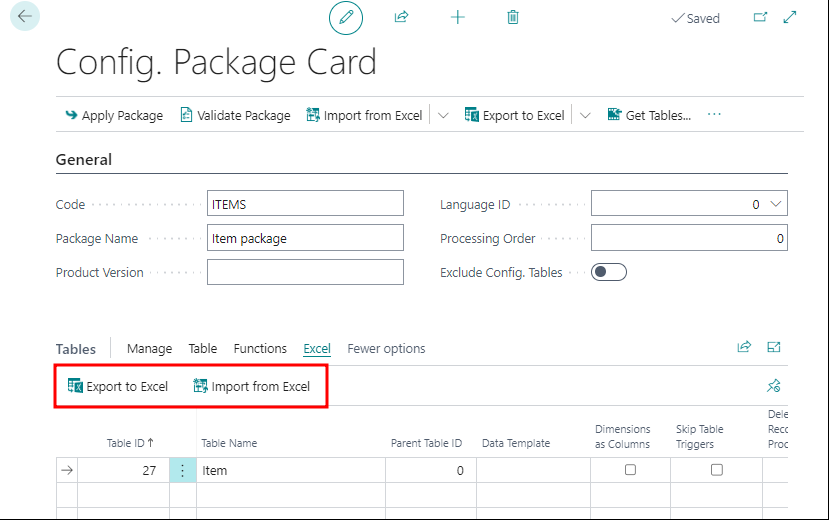
A very popular tool to export and import data from Business Central is ‘Configuration Packages’. By using ‘Export to Excel’ or ‘Import from Excel’ actions you can easily work with data in Excel.
You can find a detailed guide on how to use configuration packages in the following article:
Definitive Guide To Configuration Packages In Business Central – Business Central Geek
Excel Buffer
The Excel Buffer is a Business Central table that allows importing and exporting data to Excel via AL language.
The table offers several methods that help in the creation of Excel files.

A bit of coding is needed, but the whole idea to export information from Business Central to Excel can be summed up in 4 steps.
- Create a new book
- Add columns and lines
- Write the information
- Close the book
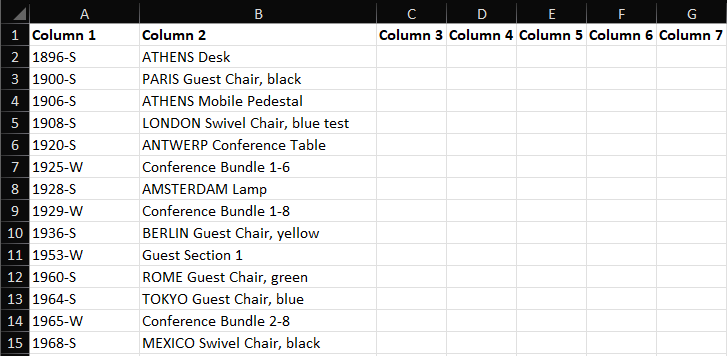
With this example, we will create a two-column sheet. The first one has Item No., and the second, is the Item Description.
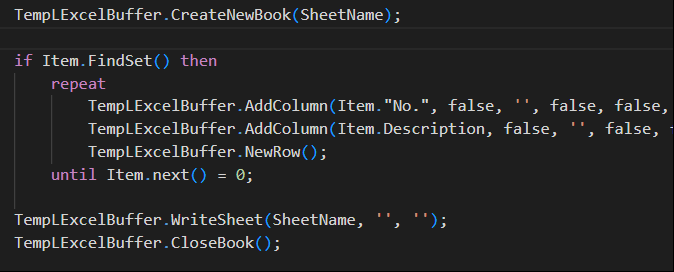
We can also add a header row and this will be the result:
Find the complete source code example here:
    procedure ExportItemsToExcel()
    var
        TempLExcelBuffer: Record "Excel Buffer" temporary;
        SheetName: Label 'Item List';
        Column: Integer;
        Row: Integer;
        OutStream: OutStream;
        InStream: Instream;
        TempBlob: Codeunit "Temp Blob";
        FileName: Text;
        Item: Record Item;
    begin
        TempLExcelBuffer.CreateNewBook(SheetName);
        // Header
        for Column := 1 to 10 do begin
            TempLExcelBuffer.AddColumn('Column ' + Format(Column), false, '', true, false, false, '', TempLExcelBuffer."Cell Type"::Text);
        end;
        TempLExcelBuffer.NewRow();
        // Rows
        if Item.FindSet() then
            repeat
                TempLExcelBuffer.AddColumn(Item."No.", false, '', false, false, false, '', TempLExcelBuffer."Cell Type"::Text);
                TempLExcelBuffer.AddColumn(Item.Description, false, '', false, false, false, '', TempLExcelBuffer."Cell Type"::Text);
                TempLExcelBuffer.NewRow();
            until item.next() = 0;

        TempLExcelBuffer.WriteSheet(SheetName, '', '');
        TempLExcelBuffer.CloseBook();

        // Download Excel
        TempBlob.CreateOutStream(OutStream);
        TempLExcelBuffer.SaveToStream(OutStream, true);
        TempBlob.CreateInStream(InStream);
        CopyStream(OutStream, InStream);
        FileName := 'ItemList.xlsx';
        DownloadFromStream(InStream, '', '', '', FileName);
    end;
Excel Report
Another option to export information to Excel is by using an Excel report. By default, Business Central offers the possibility to extract the information of a report to Excel.
Recently, Microsoft introduced a new feature called ‘Excel layouts’. It allows users to create and edit report layouts using Excel.
This provides users with a wider range of capabilities for designing reports, as they can use all of the features that are available in Excel, such as charts, pivot tables, and conditional formatting.
The way to use it is very simple.
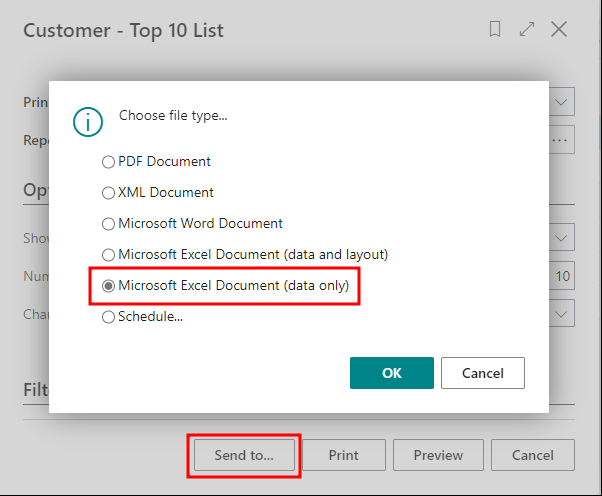
- Download Excel (data only)
- Create a new worksheet with your personalizations
- Upload the new layout
Microsoft provides several examples created so you can see the benefits of this feature. You can find them here:
BCTech/samples/Excel at master · microsoft/BCTech · GitHub
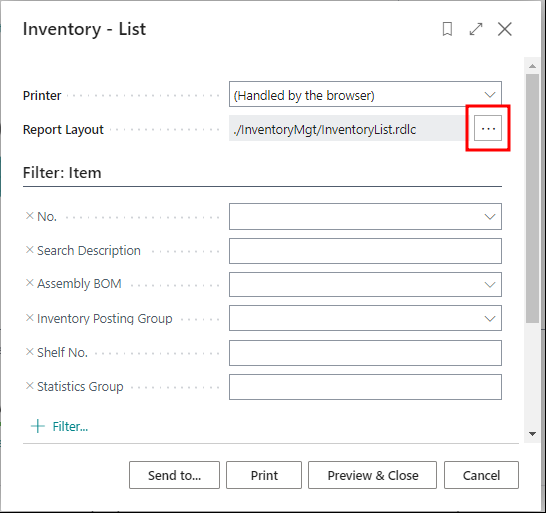
For this example, we will use the ‘Inventory – List’ Excel template from the GitHub example.
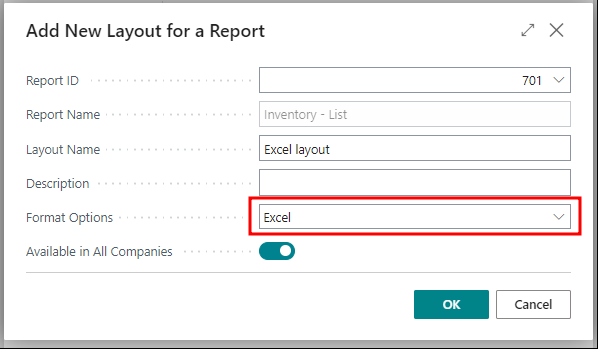
Go to the ‘Inventory – List’ report and click on the three dots next to the report layout.
Click on ‘New Layout’.
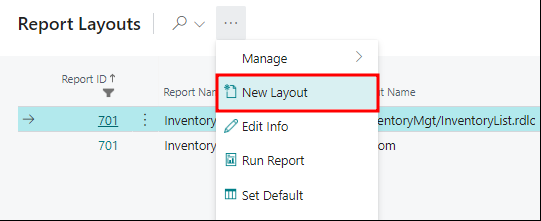
Choose ‘Excel’ as the ‘Format Options’ and upload the Excel from the example.
Once ready, you can select the new layout and see the result. In this example, we have three different sheets for resale, active, and all items.
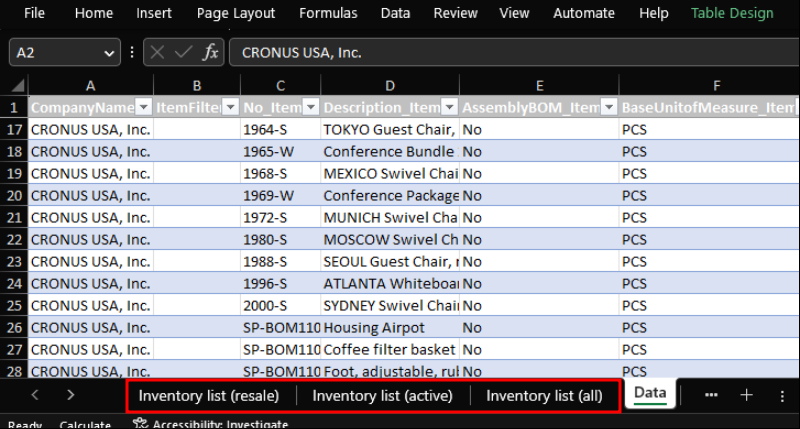
Now, every time you run this report layout, the data will be updated, and the structure maintained.
You can find more information about report layouts in the following links.
Working with Excel Layouts – Business Central | Microsoft Learn
That´s all. Hope you find it helpful.
“The only thing to do left is to map the fields from the Excel sheet to the Business Central fields.”
Ok a great guide, only one problem – how do you do that?
You can see it in the image.