
A good way for running background processes in Microsoft Dynamics 365 Business Central is by using the Task Scheduler. In this post, you will learn what is it and how you can use it in Visual Studio Code for running background tasks.
- What Is The Task Scheduler In Business Central?
- Considerations When Using The Task Scheduler
- How To Use TaskScheduler.CreateTask
- Scheduled Tasks Page
What Is The Task Scheduler In Business Central?
The Task Scheduler is the engine designed to run Job Queues. It enables to control when certain operations or processes are run. And enables to program tasks at a specific date and time. You can perform either read or write transactions. Every time a task is run it will start a background session to run the process.
We have the possibility to use the ‘Task Scheduler’ data type to schedule background tasks via code. We are not restricted to use Job Queues. Although the Job Queue relies on the Task Scheduler we can use it separately. However, we can´t program recurring tasks with the Task Scheduler only. For that, we will need to use the Job Queue that runs on top.
Although they are different, the behavior is similar to the ‘StastSession’ function. Check the following article to know more about this function:
Considerations When Using The Task Scheduler
The Retry Cycle
One of the advantages of using the Task Scheduler over the StartSession function is that if a server restart happens, it will retry to run the process after it is available again. This feature is called the Retry Cycle. Business Central has predefined times between attempts. These attempts are different between On-premise and Online environments:
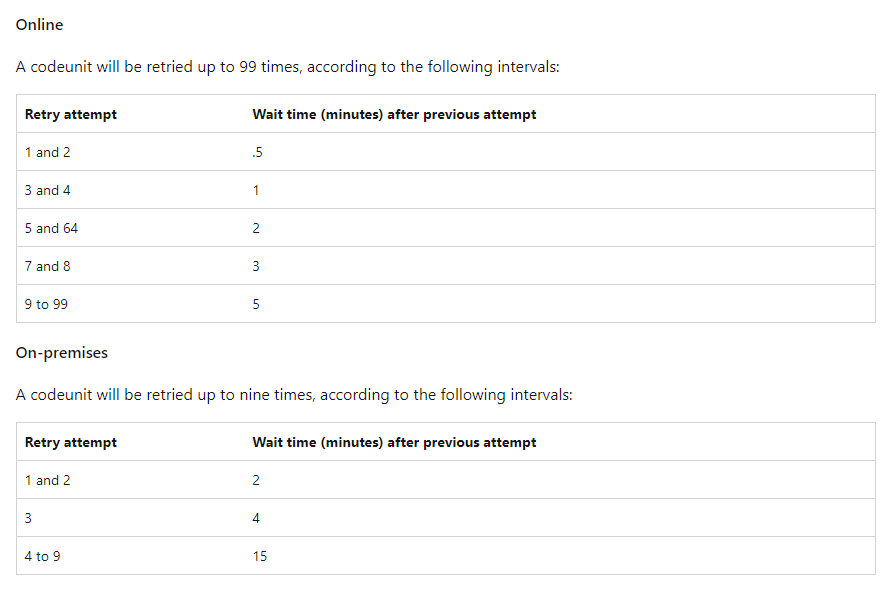
Get more information about the retry cycle here:
Dialog Boxes
As in the StartSession function, dialog boxes are suppressed. This is how they are handled:
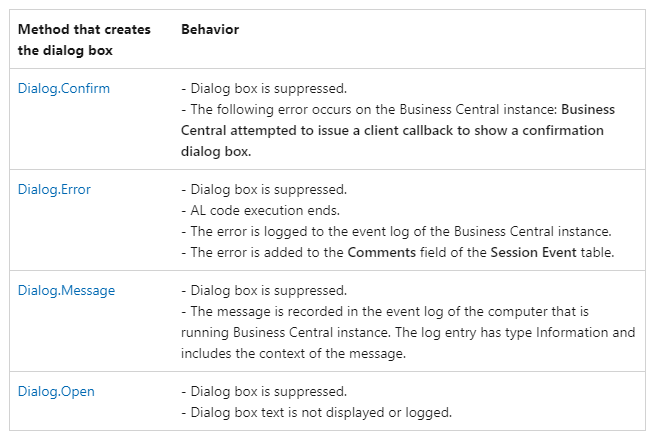
Get more information about how it here:
Error Handling
Another advantage of the Task Scheduler over the StartSession function is error handling. We have the possibility to use use a failure codeunit and acknowledge the problems encountered in the process.
You will find an example of how to use a failure codeunit in the section below.
How To Use TaskScheduler.CreateTask
As mentioned earlier, the Task Scheduler runs the Job Queue. We can find the example in the source code of the Base App.
In codeunit 453 ‘Job Queue – Enqueue’ we can have a look at how the job queue uses the task scheduler.
Let´s look into the ‘JobQueueEntry.ScheduleTask’ function.
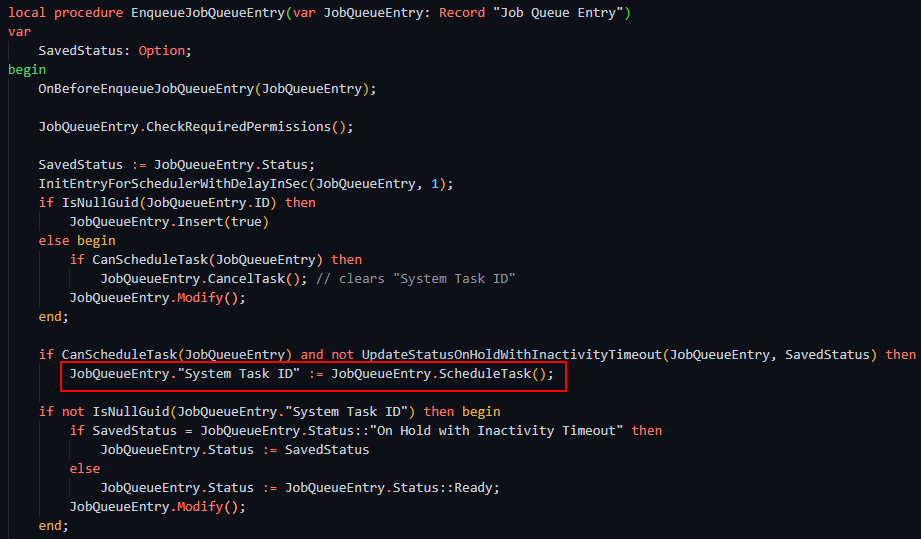
We can see that is in the exit return value where the Task Scheduler is being used. The Task Scheduler is using the ‘CreateTask’ function.
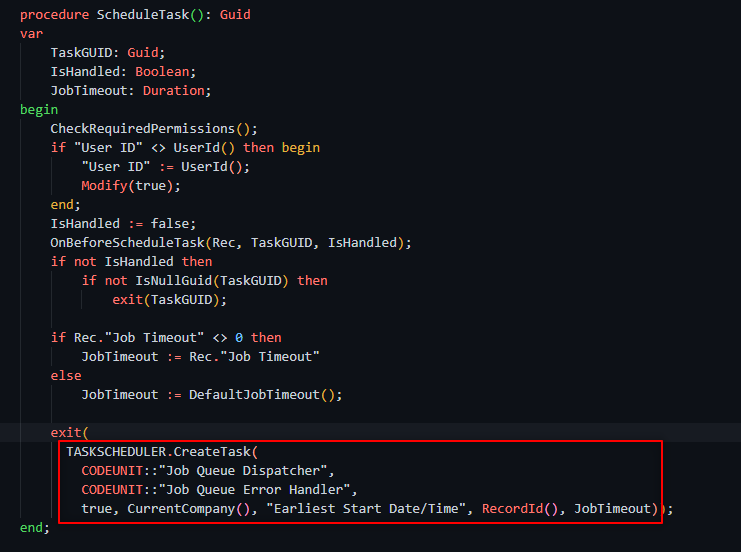
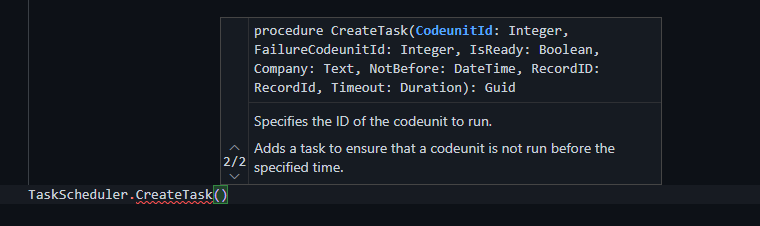
You can see in the following image all the parameters of this function. There is a failure codeunit, along with the ‘IsReady’ status. Then the company, the date and time for running the task, and finally the RecordId and a possible timeout.
There are 5 functions available in the TaskScheduler data type.
- CancelTask
- CanCreateTask
- CreateTask
- SetTaskReady
- TaskExists

Get more information about them here:
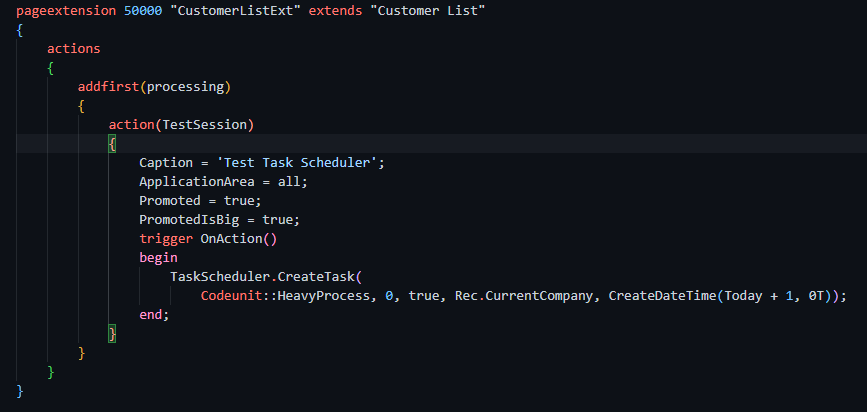
Quick Example Of Using TaskScheduler.CreateTask
Let´s have a look at a simpler example. We can create a scheduled task with a single line of code. The parameters to use are:
- The codeunit to run the process. In this example is called ‘HeavyProcess’.
- The failure codeunit. If we don´t need one we can set it to zero.
- The status. We want to set it as ready so we use ‘true’.
- The company where it should run.
- The date and time for the scheduled process.
Scheduled Tasks Page
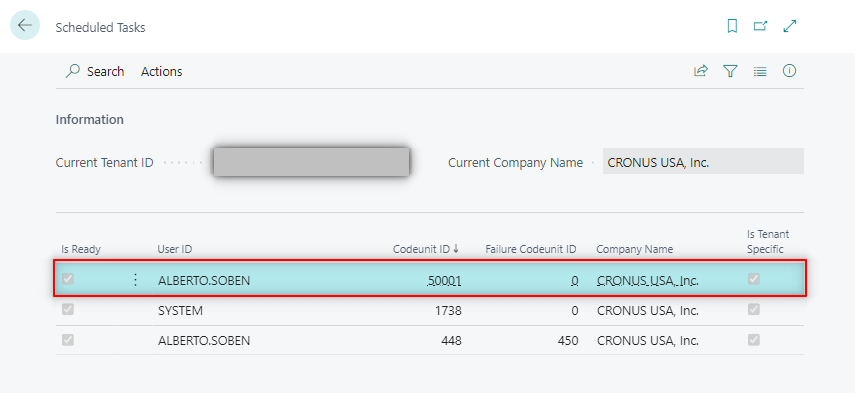
There is a page where we can find all the planned tasks across our tenant. If you look for ‘Scheduled Tasks’ in the browser you will find a page similar to the image below.
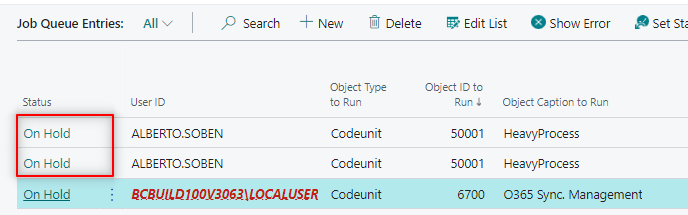
We can see the task scheduled for our process in codeunit 50001 for the current company.
Also, we will see any scheduled entry from the job queue. You can see that it will run codeunit 448 ‘Job Queue Dispatcher’. All entries scheduled from the Job Queue will run codeunit 448 and the failure codeunit 450 ‘Job Queue Error Handler’.
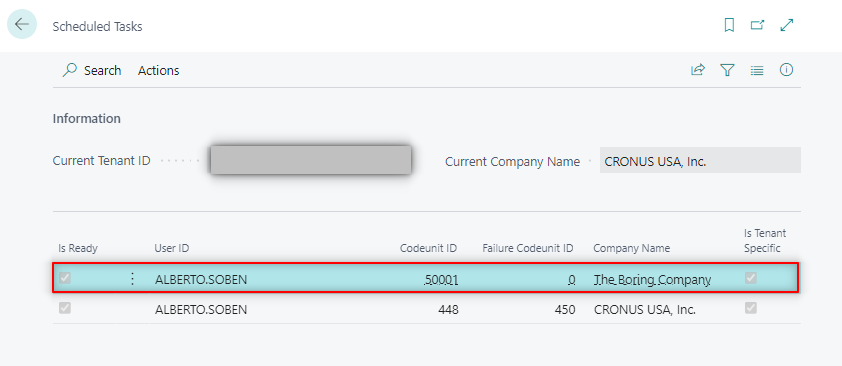
Furthermore, we can see scheduled tasks from other companies if we have them. In this case, we have one from ‘The Boring Company’ and the other from CRONUS.
From this page, we only have two actions available.
- Cancel Task. It will cancel and delete the selected tasks.
- Set Task Ready. It will set the task as ready to run.

Keep in mind that if you cancel a task scheduled from the Job Queue the Status will change to ‘On Hold’. If you wish to set it as ready again you will have to do it from the Job Queue.
That´s all. Hope you find it useful.